In this article, I will show how to configure privacy settings on Windows 10 which I divide into 6 sections as following:
- General privacy settings
- Wi-Fi Sense
- Sync settings with Microsoft account
- Windows update file sharing
- Microsoft Edge
- Windows SmartScreen
Watch on YouTube
Configure privacy settings on Windows 10
General privacy settings
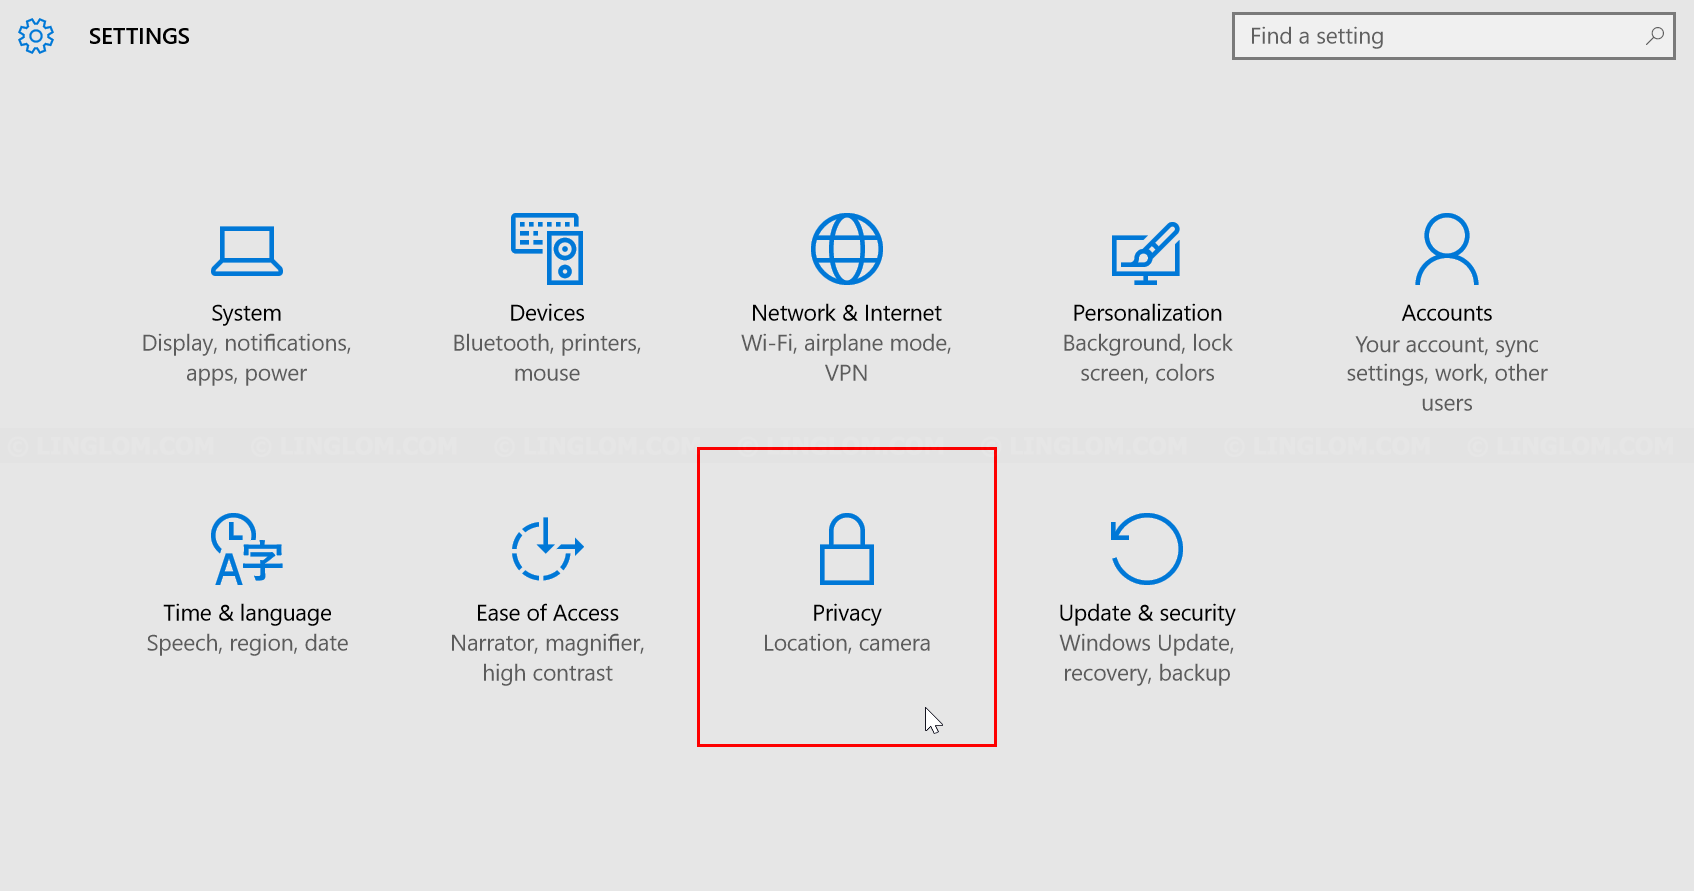
- On Windows 10 desktop, right-click on Windows icon at bottom left and select Settings. Then, click Privacy.
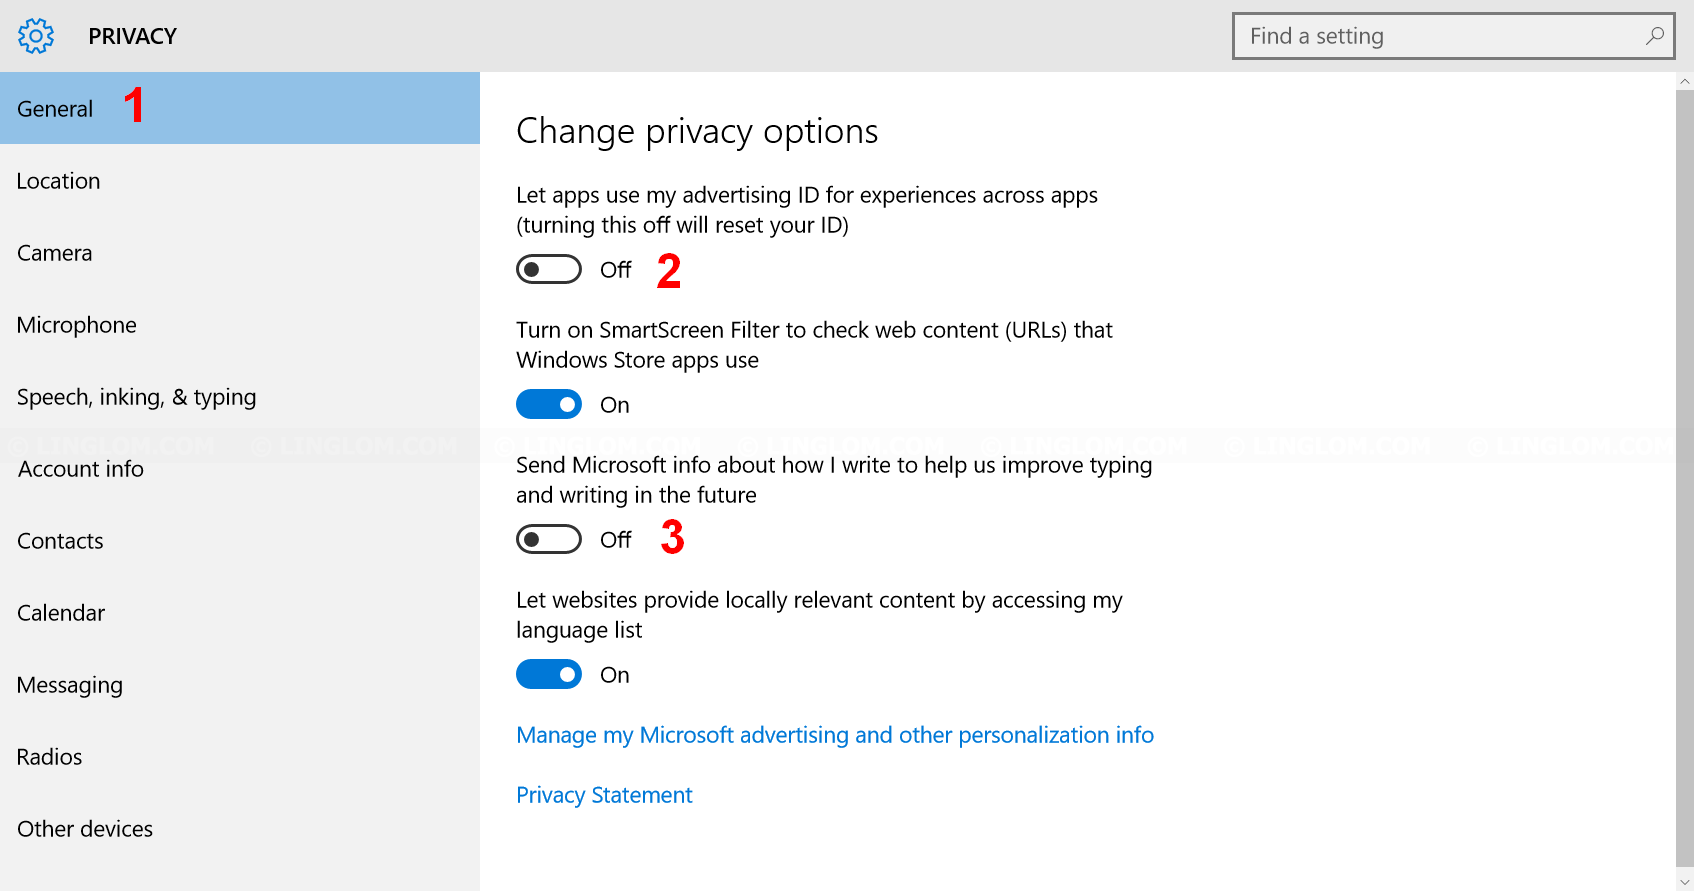
- Click General tab on the left menu.
- Advertisers want to know about you so they can provide ads relevance to your interests. If you don’t want this, switch off the option Let app use my advertising ID for experience across apps.
- I also suggest to switch off Send Microsoft info about how I write to help us improve typing and writing in the future.
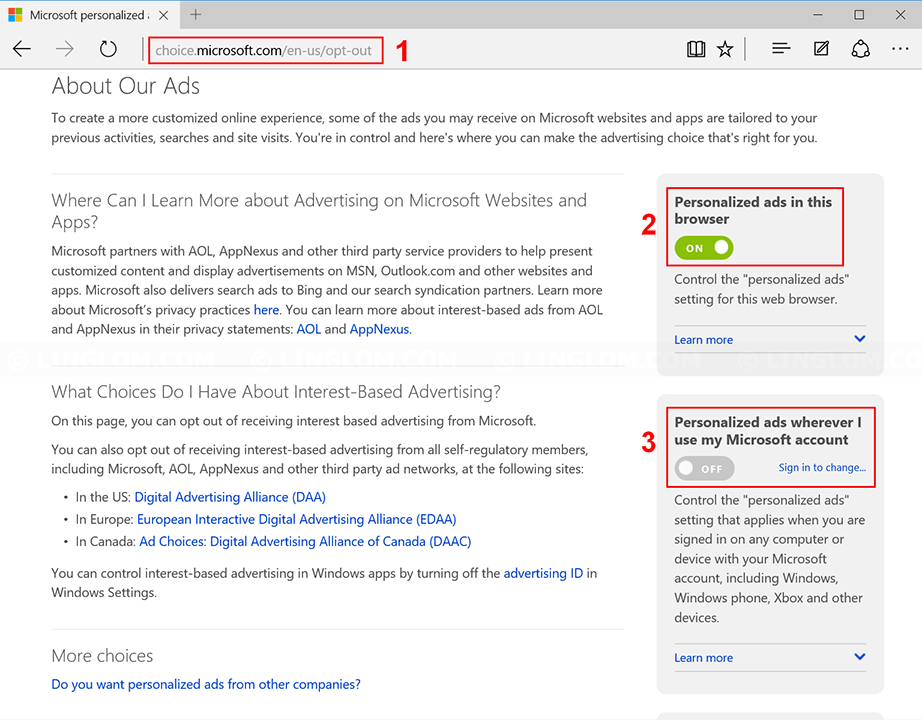
- To disable targeted ads, open web browser to http://choice.microsoft.com/en-us/opt-out. Set both options Personalized ads in this browser and Personalized ads whenever I use my Microsoft account to Off.
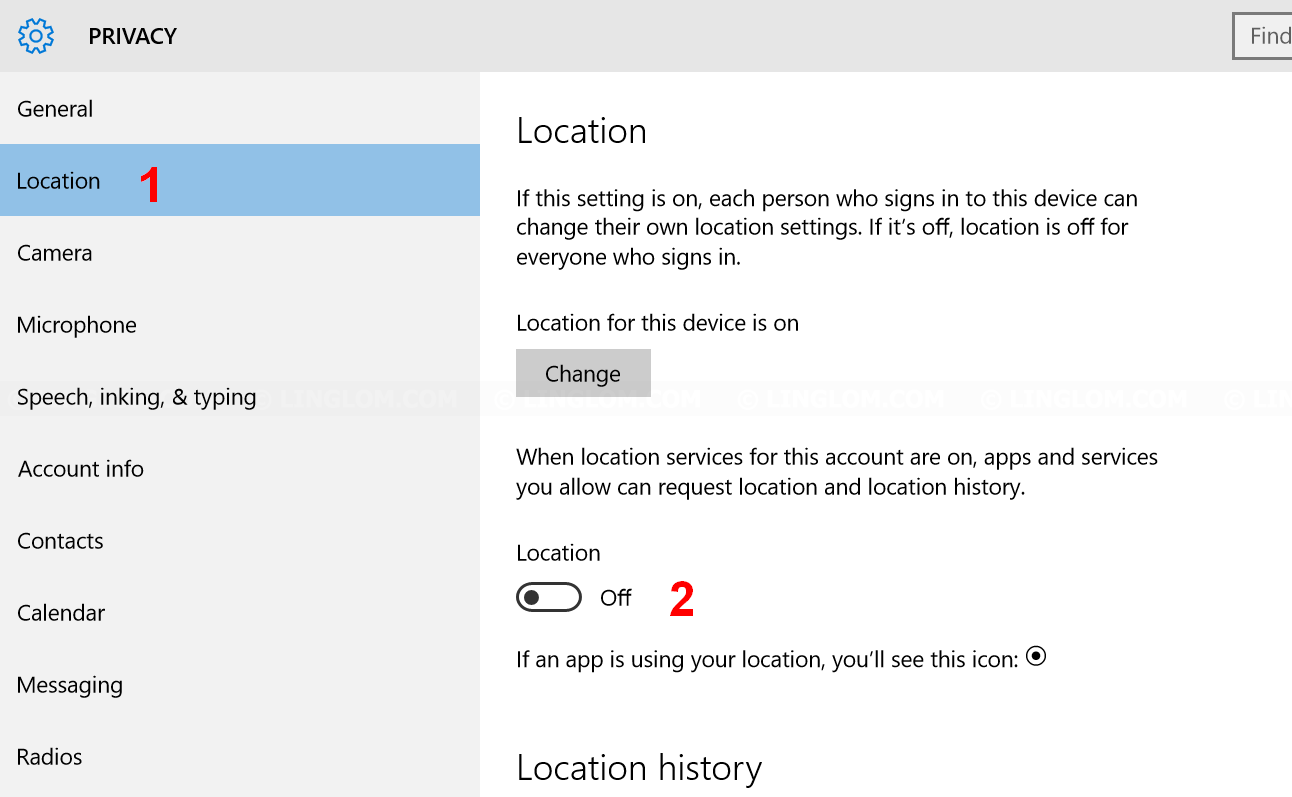
- Location setting allows app such as Maps to get your exact location. This may be useful if you travelling and use this feature. But if you have desktop system which doesn’t go anywhere and you don’t use this feature, you should turn it off.
Note: You can also delete location history by scroll down on this page and click Clear.
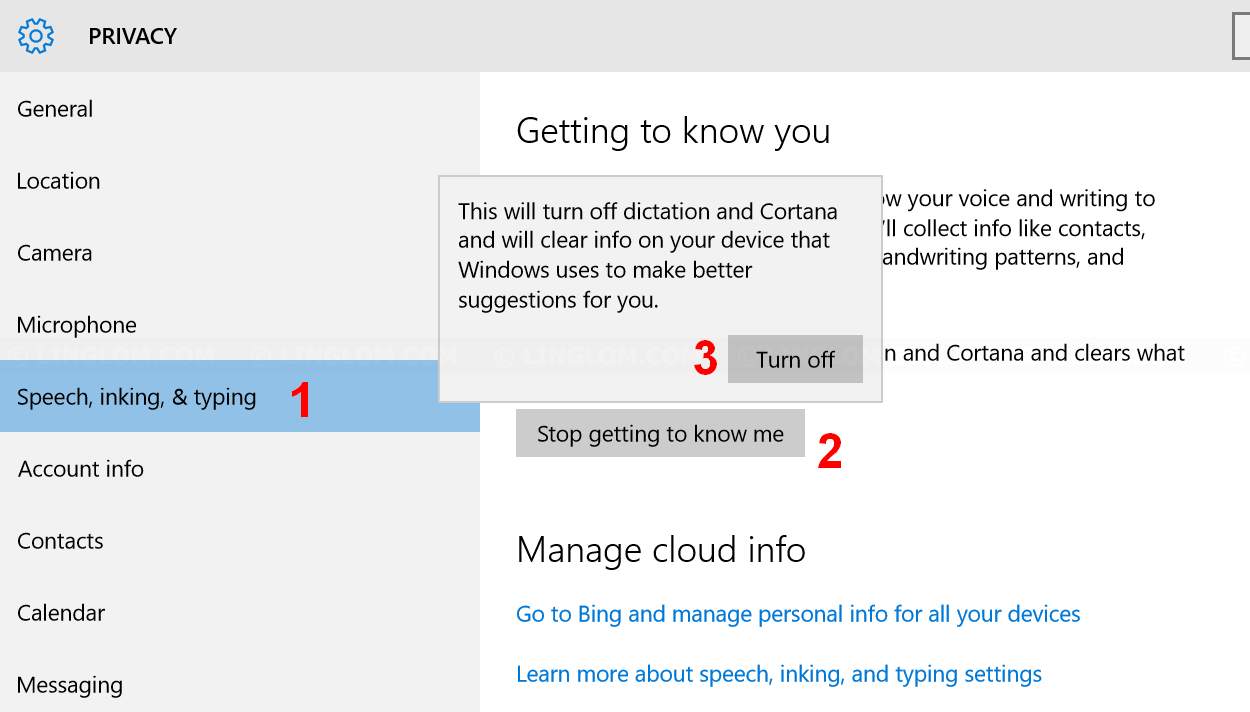
- In order to make personalized suggestions, Windows 10 and Cortana collect usage information about your activities and personality so Cortana can understand you better and respond to your command more accurate. If you don’t use Cortana and don’t want the system to collect your personalized information, click Speech, inking, & typing on the left menu. And click Stop getting to know me. Then, click Turn off to confirm.
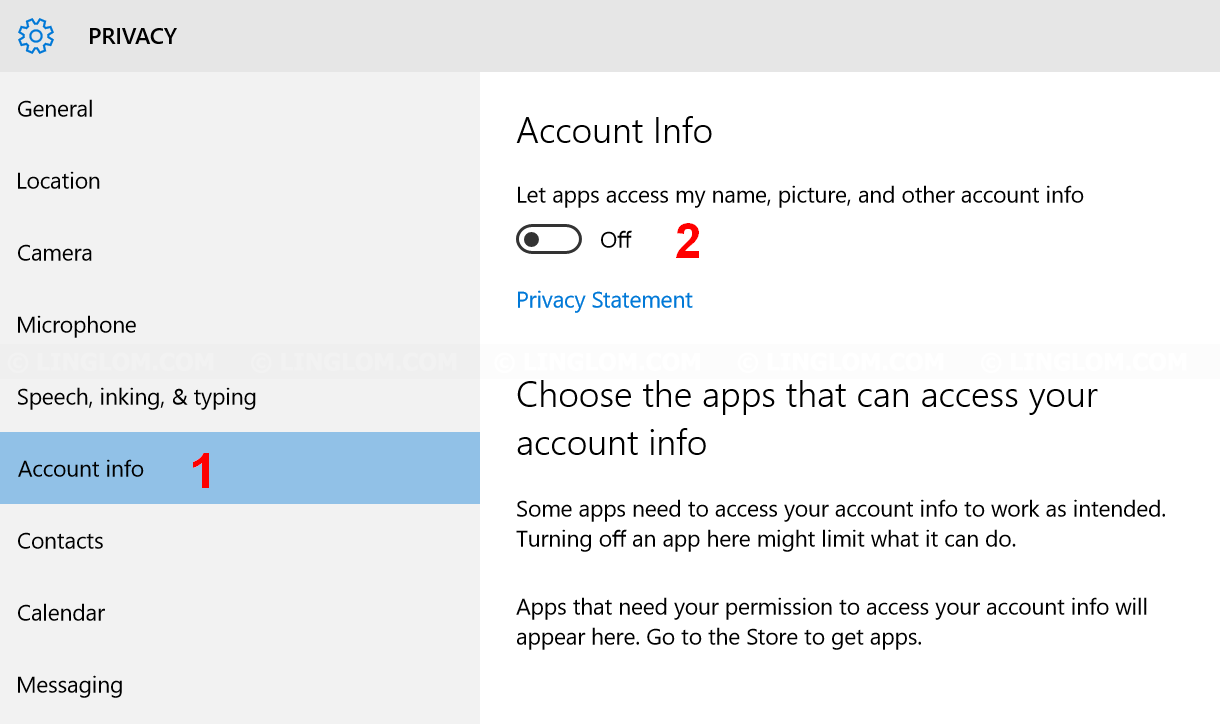
- By default, third-party apps that you installed from Windows Store can access your account information (name, picture, etc). If you don’t want to share these information, select Account info on the left menu. And switch off the option Let apps access my name, picture, and other account info. However, some app may require account access, you can choose to allow only specific app later on this page.
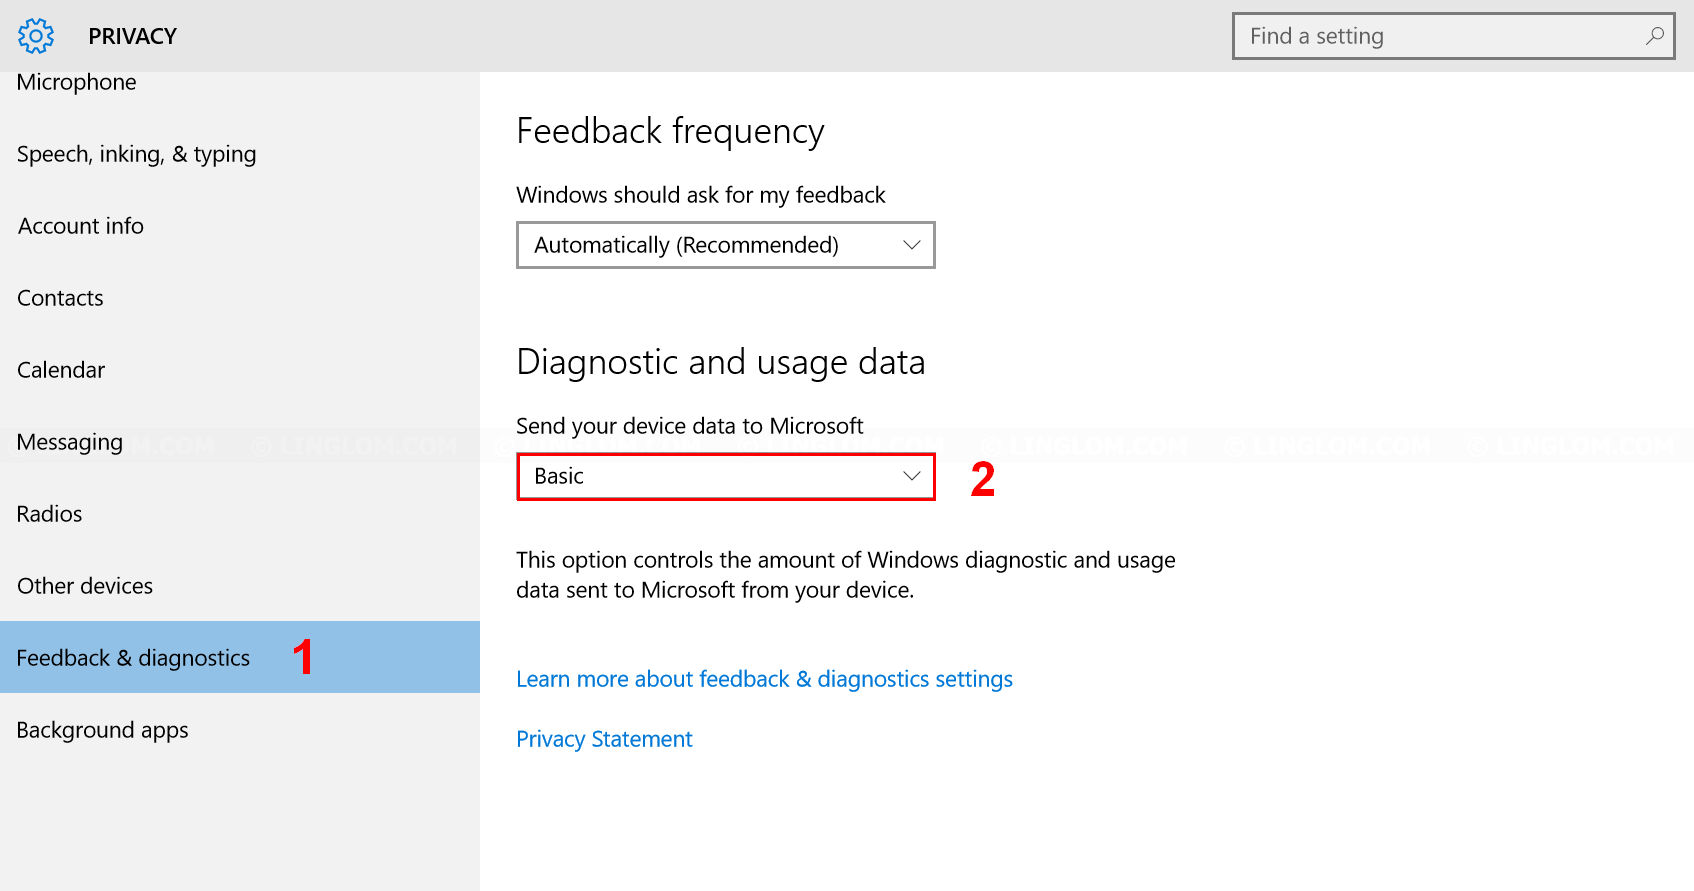
- When Windows crashes or terminated unexpectedly, it will send information about the crash to Microsoft to help identifies the problem and fix it. With the default option, it could send your personal information, part of document you were working on when a crash occurred and probably other related information.
To limit information being sent, select Feedback and diagnostics on the left menu and change this option to Basic. You can check more details about the option on this link – http://windows.microsoft.com/en-us/windows-10/feedback-diagnostics-privacy-faq
Wi-Fi Sense
Note: This section is only for users who use wireless network and sign in with Microsoft account.
Windows 10 has a new feature called Wi-Fi Sense which allows you to share your Wi-Fi or connect to a Wi-Fi network from your outlook, Skype, and Facebook friends. This is convenience, for instance, if you have friends, in your contact lists, come to your house. They can connect to your Wi-Fi without asking your password.
Note: They can’t share your Wi-Fi with their friends which makes this is more secure than giving Wi-Fi password to your friends.
- On Windows 10 desktop, right-click on Windows icon at bottom left and select Settings. And click Network & Internet.
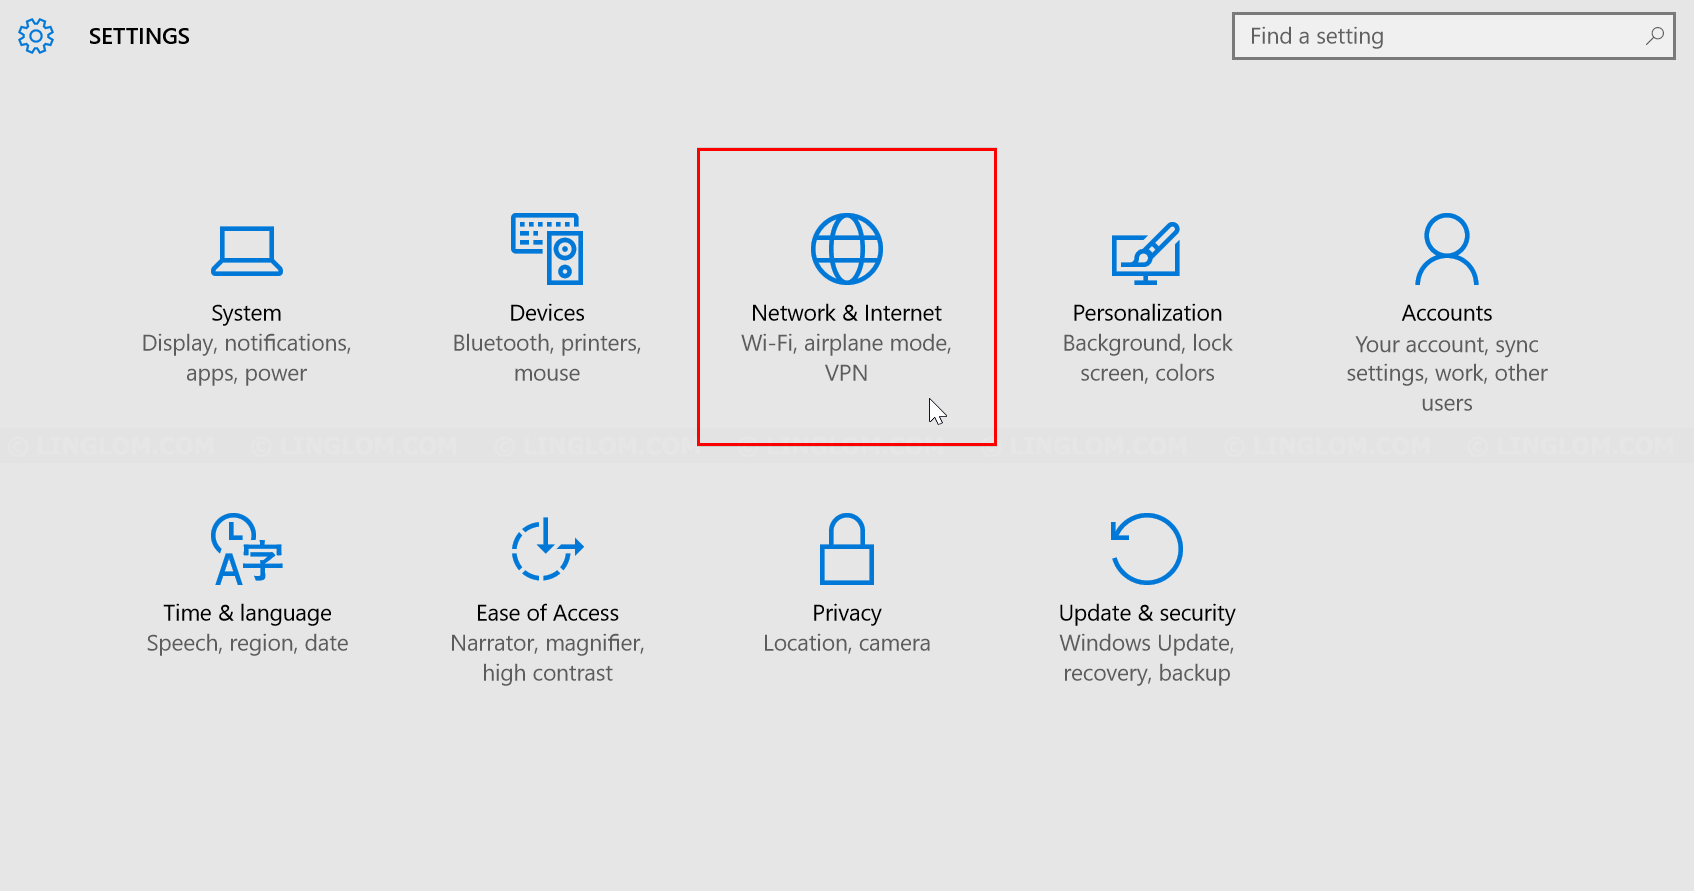
- Click Wi-Fi on the left menu and select Manage Wi-Fi settings.
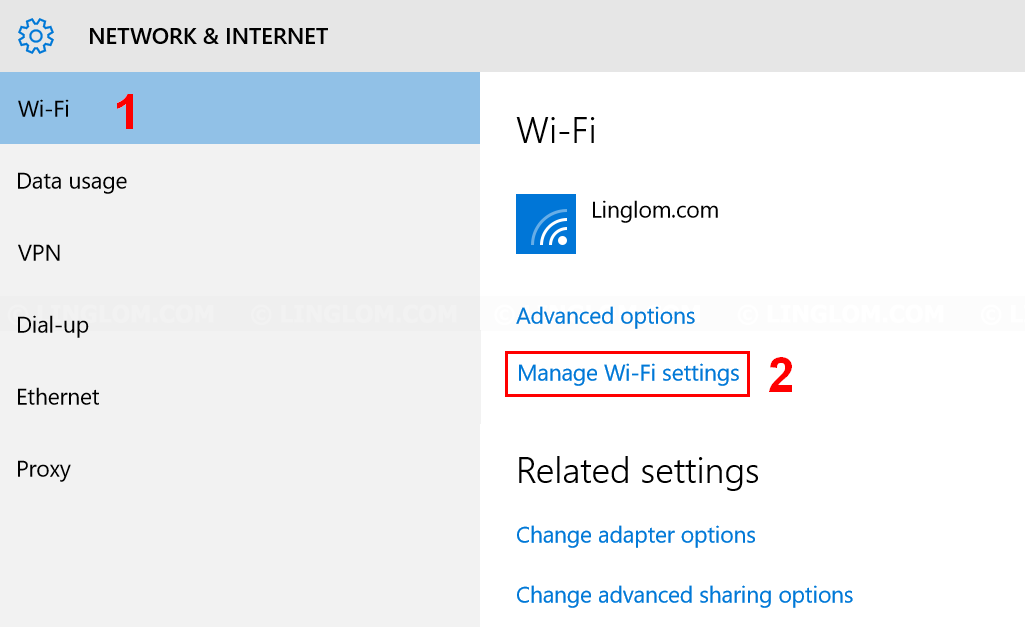
- To turn off Wi-Fi Sense on this PC, switch off connect to suggested open hotspots and connect to networks shared by my contacts.

To completely turn off this feature, add _optout to the end of your network SSID (for example, mynetwork_optout) on your Wi-Fi router to prevent someone else may enable this feature.
Sync settings with Microsoft account
Note: This section is only for users who sign in with Microsoft account.
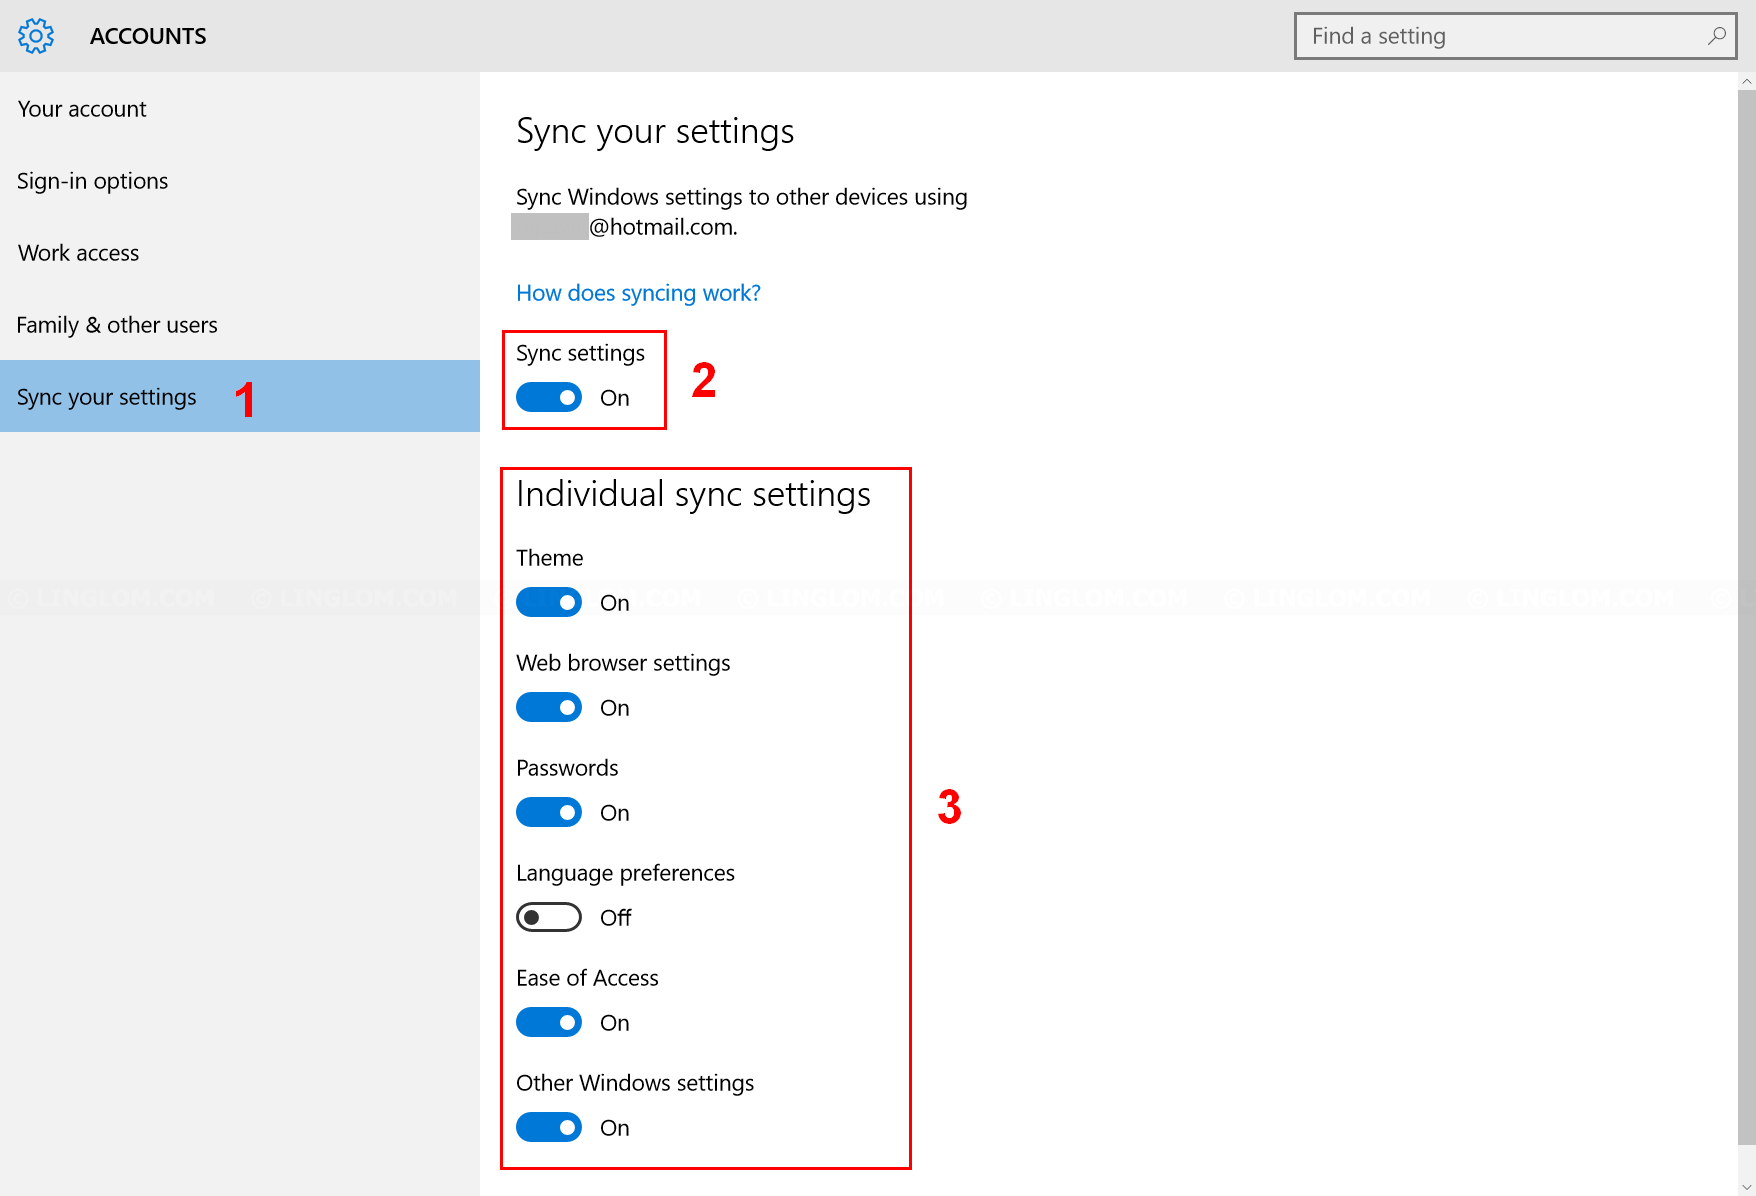
If you sign in with Microsoft account, the default settings allow you to sync Windows settings, such as, your themes, web browser settings, passwords, to other Windows 10 PCs. To turn off or customize this feature, follow steps below.
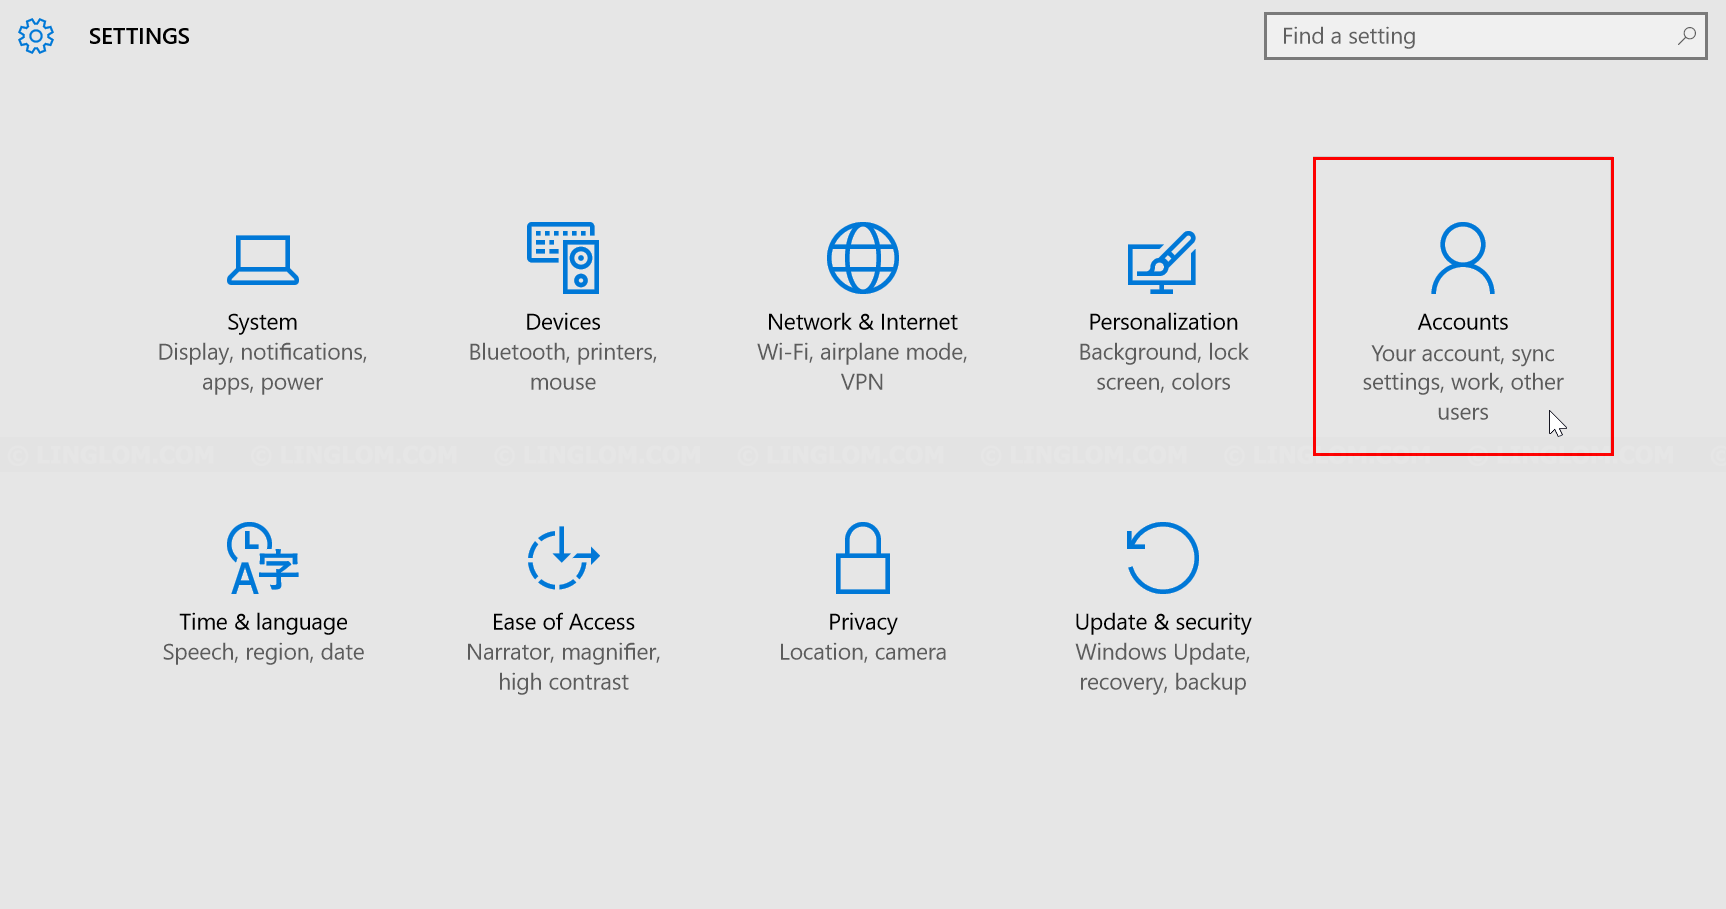
- On Windows 10 desktop, right-click on Windows icon at bottom left and select Settings. And click Accounts.
- Here you can customize what to sync to other devices. If you don’t want to use this feature, you can switch this option Sync settings to Off.
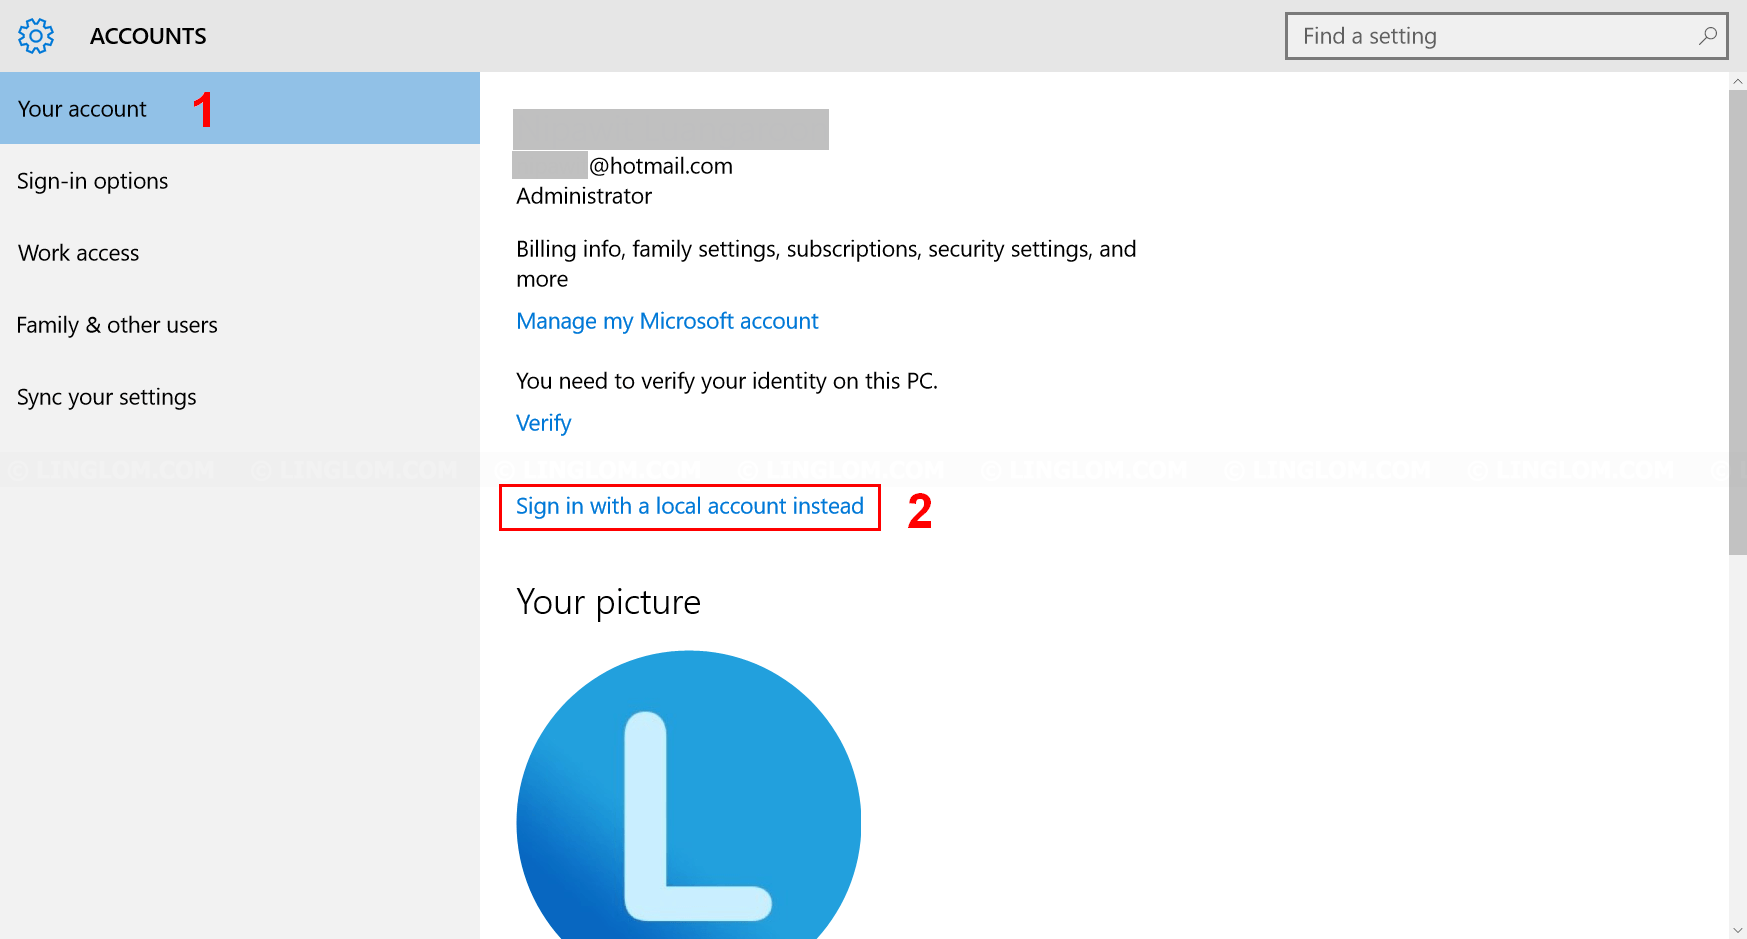
- Or you can disable this feature by switch to use local account. Click Your account on the left menu and click Sign in with a local account instead. Then, follow the instructions.
Note: You won’t be able to download apps from the Windows Store if you use local account.
Windows update file sharing
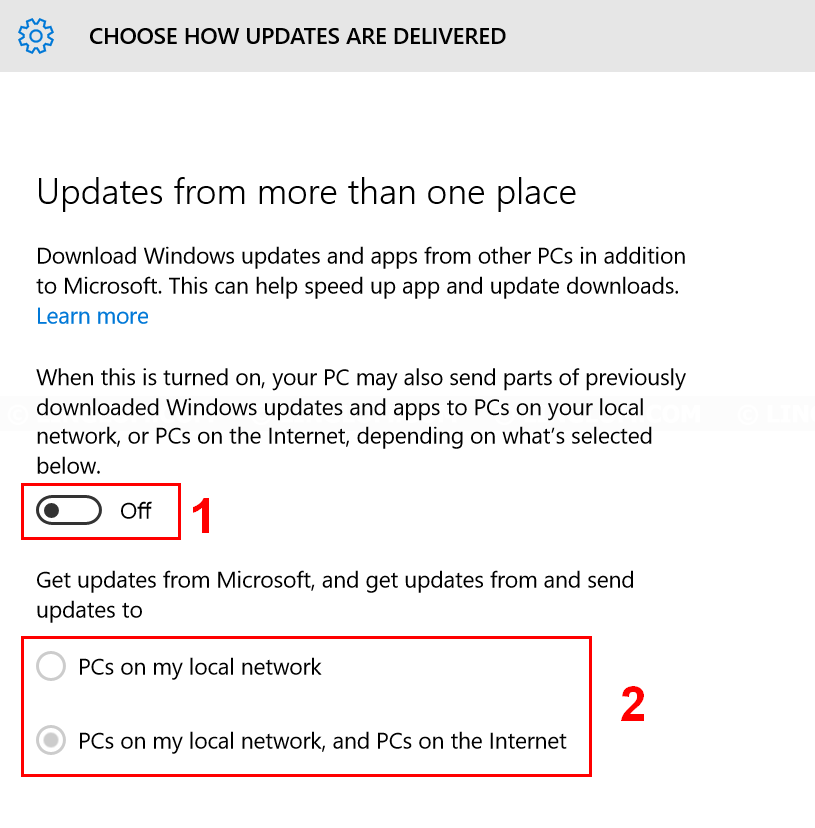
By default, Windows 10 isn’t only download updates from Microsoft servers, but it uses peer-to-peer file sharing to distribute updates which means that updates may be downloaded from other PCs and your PCs may also provide updates to others. This might be a good idea to speed up distributing updates, but it takes bandwidth of your network. If you don’t like this feature, you can configure by follow these steps.
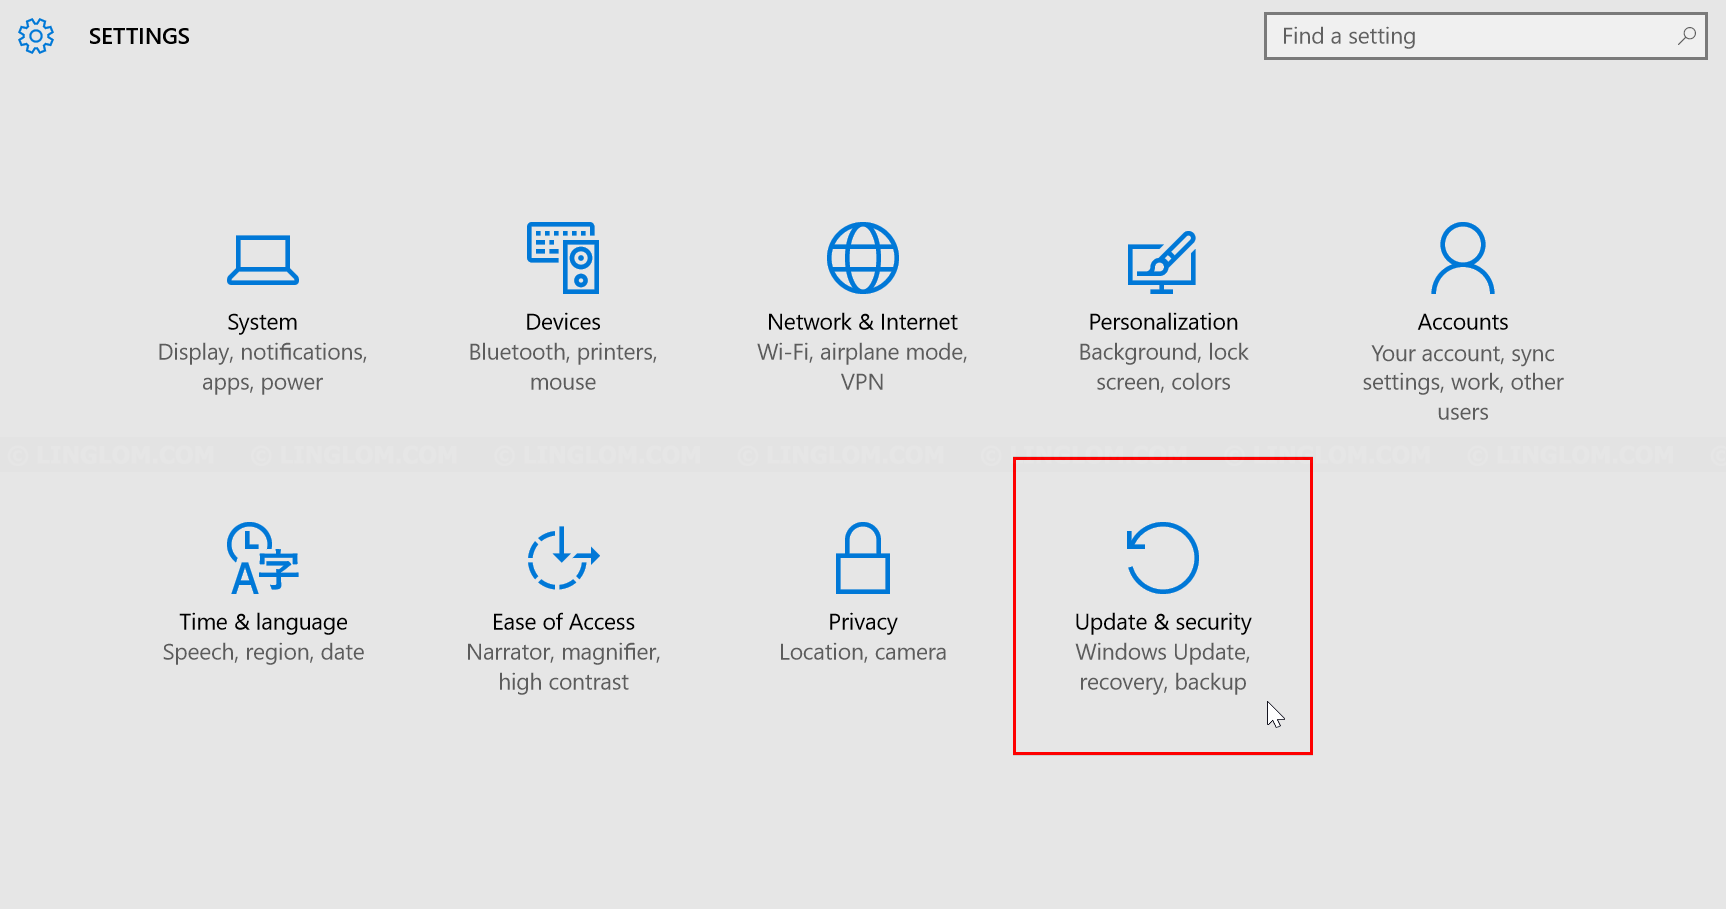
- On Windows 10 desktop, right-click on Windows icon at bottom left and select Settings. And click Update & security.
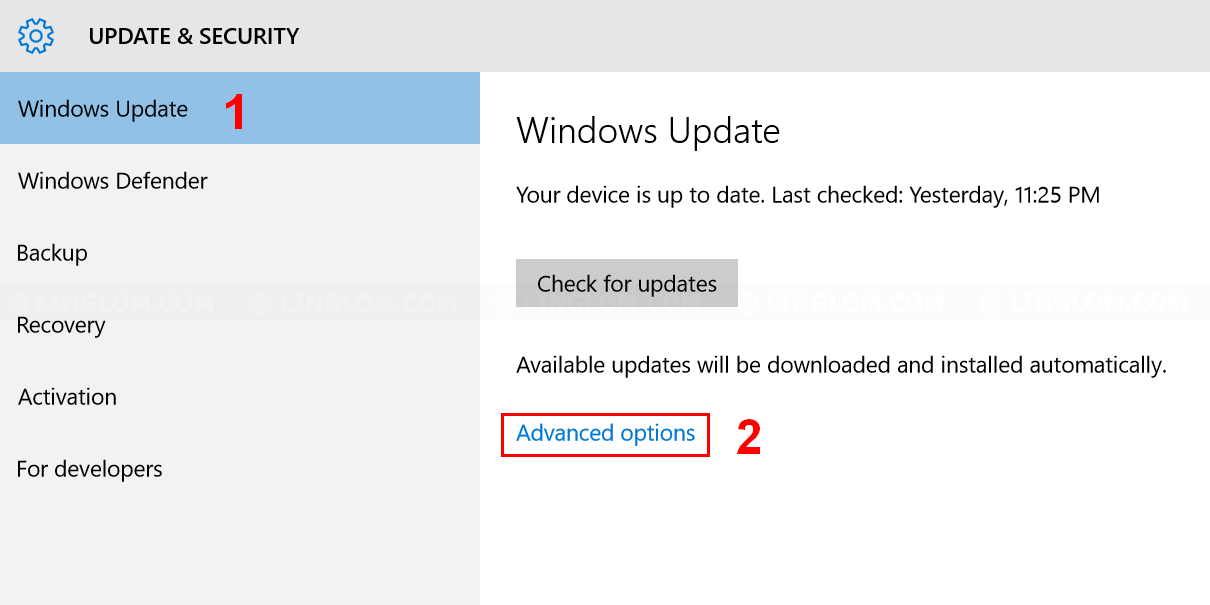
- Click Windows Update on the left menu and click Advanced options.
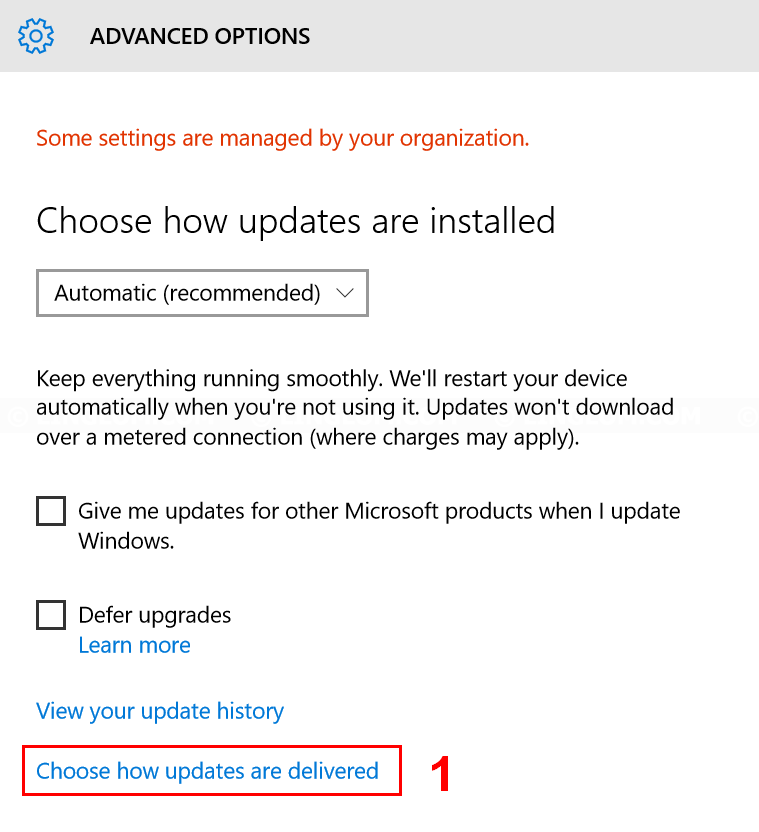
- On Advanced options, click Choose how updates are delivered.
- The default option allows you to share updates with other PCs on your local network and the Internet. You can select PC on my network to limit sharing update within your local network. Or completely turn this feature off if you don’t want to share updates with others.
Microsoft Edge
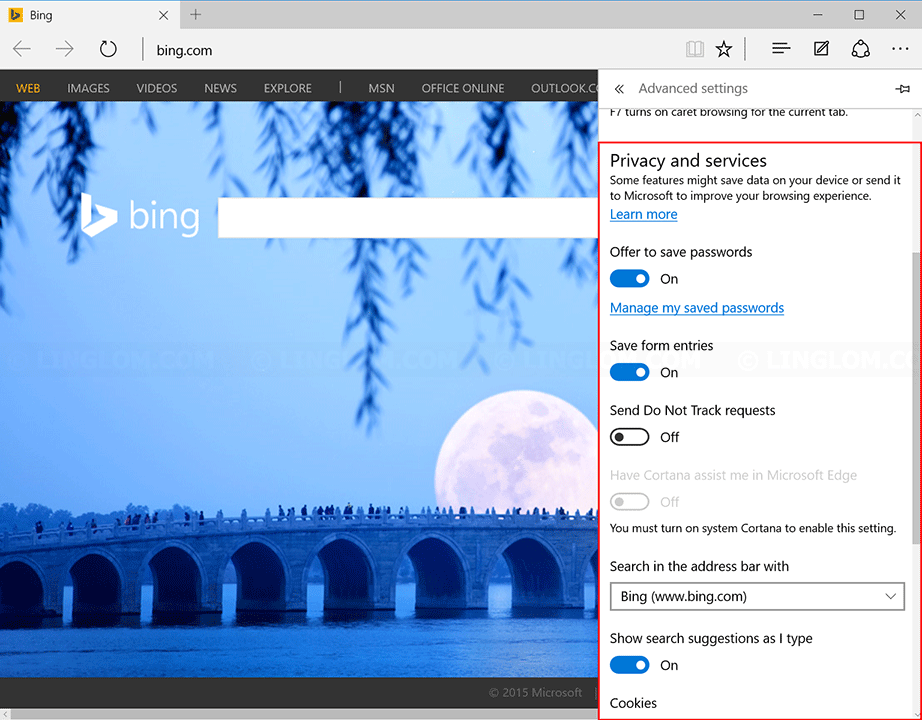
- Open Microsoft Edge and click More actions icon at top right. Select Settings and click View Advanced Settings.
- Scroll down to Privacy and services section and here you can configure privacy settings on Microsoft Edge. The Offer to saved passwords and Save form entries are both useful features which I suggest to keep them on.
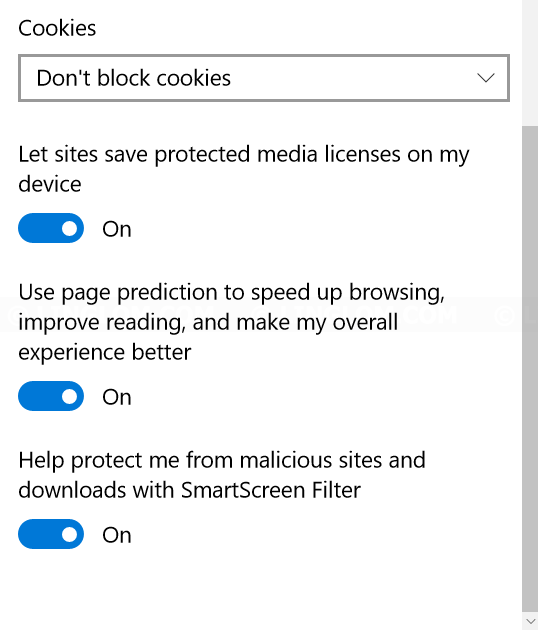
- Use page prediction may send your browsing history to Microsoft to predict which pages you’re likely to visit next, you could turn off this option if you don’t like it. The last option Help protect me from malicious sites and downloads is an useful option and usually can prevent you infecting your PC from accessing malicious websites.
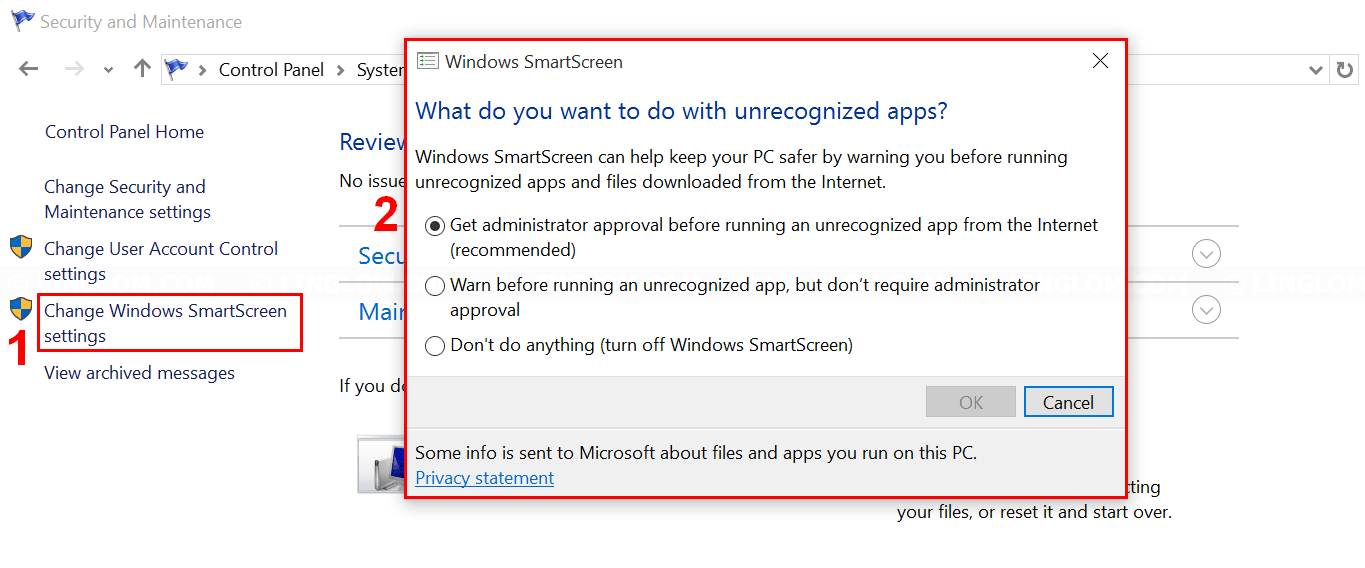
Windows SmartScreen
This feature is first appears in Windows 8. It can prevent you from installing potentially malicious programs by sharing with Microsoft about the programs you are trying to install. I suggest to keep this feature on. But if you want to turn it off, follow these steps.
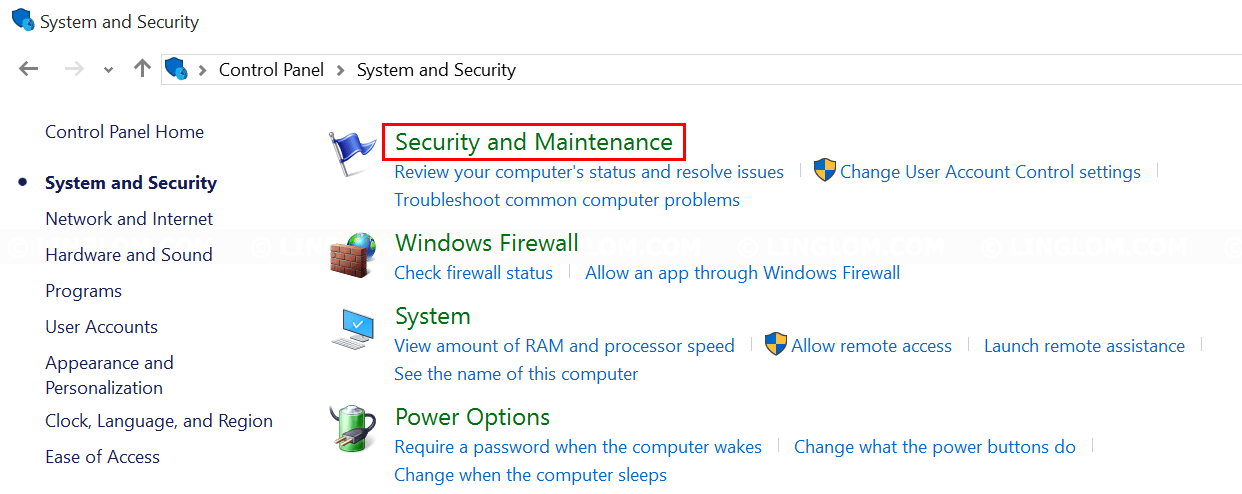
- On Windows 10 desktop, right-click on Windows icon at bottom left and select Control Panel.
- On Control Panel, select System and Security and click Security and Maintenance.
- Click Change Windows SmartScreen Settings on the left menu.
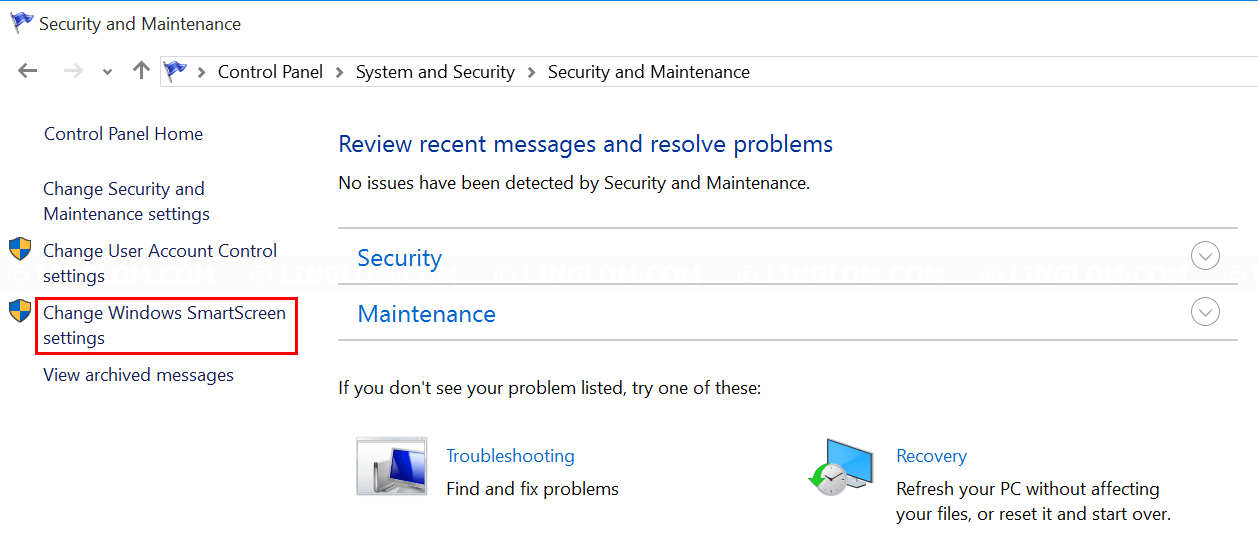
- Select Don’t do anything option and click OK.
References
- Windows 10 feedback, diagnostics, and privacy: FAQ
http://windows.microsoft.com/en-us/windows-10/feedback-diagnostics-privacy-faq - Microsoft Privacy Statement
http://www.microsoft.com/en-us/privacystatement/default.aspx