- BizTalk Training 1 – Basic Send/Receive XML Message
- BizTalk Training 2 – Receive/Send Plain Text
- BizTalk Training 3 – Customize Filename Dynamically
- BizTalk Training 4 – Using Functiods in Map
- BizTalk Training 5 – Using FTP Adapter
Receive/Send Plain Text
This tutorial shows how to receive plain text using FILE Adapter and map to xml message while in orchestration and finally send out using FILE Adapter as plain text.
There are 5 tutorials in this training.
- BizTalk Training 1 – basic send/receive xml message
- BizTalk Training 2 – receive/send plain text
- BizTalk Training 3 – customize filename dynamically
- BizTalk Training 4 – using Functiods in Map
- BizTalk Training 5 – using FTP Adapter
Objectives
- Learn to create schema using Flat File Schema Wizard.
- Learn to receive file which is plain text to BizTalk.
- Learn to send file from BizTalk to plain text.
Prerequisites
- BizTalkTraining 1 project.
- Configuration on BizTalk Administration for BizTalkTraining application.
Topics
- Create schema from plain text using Flat File Schema Wizard.
- Add receive and send pipeline for receive/send plain text.
- Modify orchestration.
- Deploy the project.
Step-by-step
As from training 1, I have sample file which is an xml message. Now what if I want a plain text as an input, BizTalk can receive any file format which you can determine the schema in pipeline.
Suppose, I have the same data as in training 1 but it’s a plain text instead of xml in C:\FILE2\person1.txt.

- Create schema from plain text using Flat File Schema Wizard.
- Open existing BizTalkTraining project, Add New Item to the project.

- Select Schema Files -> Flat File Schema Wizard and name the schema as “FlatFilePersonSchema.xsd”.

- BizTalk Flat File Schema Wizard appears, click Next.
- On Instance file, click Browse and select the sample text file that you want to create schema from. Change Record name to ‘Person’ and click Next.

- On Select Document Data, leave the data highlight and click Next.

- Click Next.

- Ensure that Child delimiter is {CR}{LF} which means split data with new line characters. Click Next.

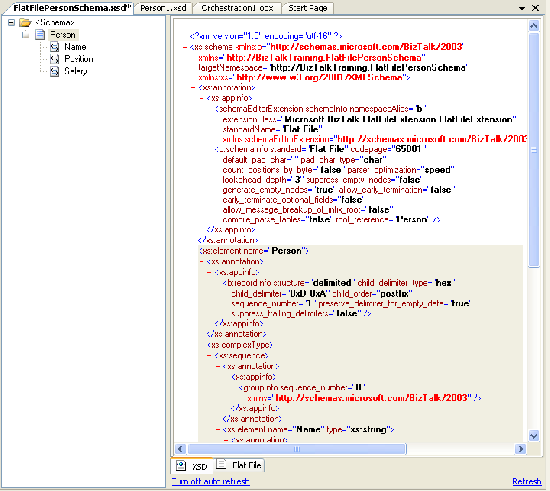
- Change Element Names and Data Types as in figure below.

- Click Finish.

- Now that you have created a schema file from plain text.
- Add receive and send pipeline for receive/send plain text.
- Add New Receive Pipeline.
Right click on the project -> Add New Item -> select Pipeline Files -> Receive Pipeline -> name as ReceivePersonPipeline.btp.
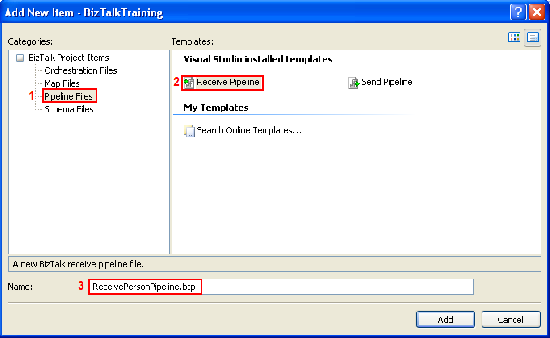
- New receive pipeline appears.
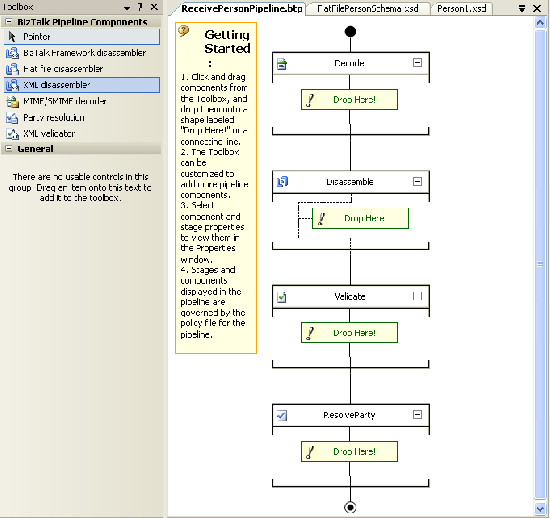
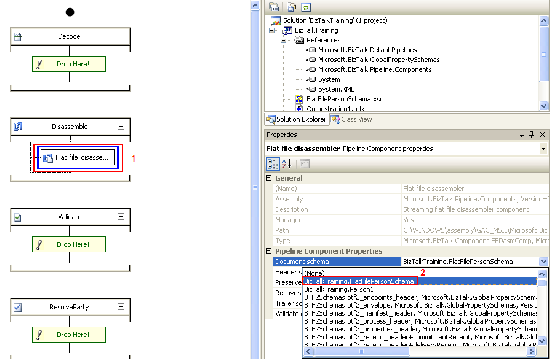
- Drag Flat File disassembler to Disassemble stage.
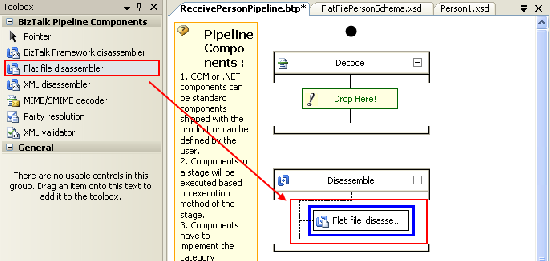
- Click on Flat file disassembler object that you’ve just dropped.
On Properties, change Document schema to “BizTalkTraining.FlatFilePersonSchema” which is the schema that we’ve created previously.
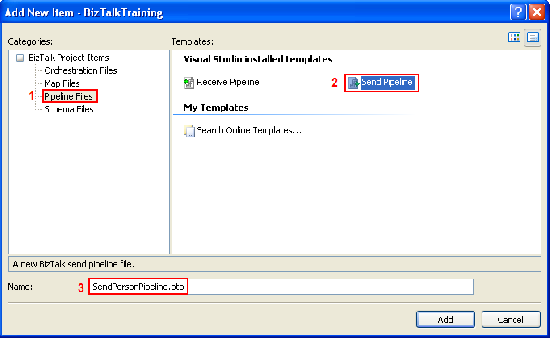
- Now add new Send Pipeline.
Right click on the project -> Add New Item -> select Pipeline Files -> Send Pipeline -> name as SendPersonPipeline.btp.
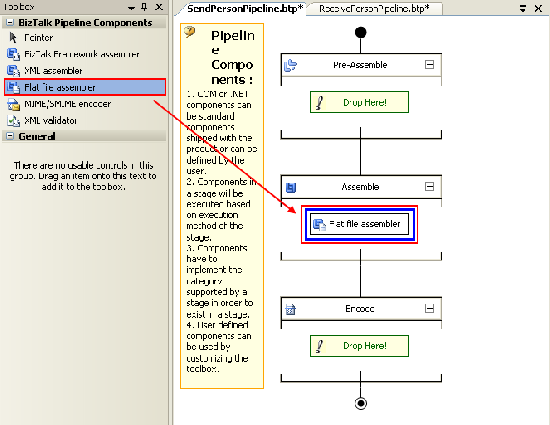
- Drag Flat file assembler to Assemble stage.
- Click on Flat file assembler object that you’ve just dropped.
On Properties, change Document schema to “BizTalkTraining.FlatFilePersonSchema” which is the schema that we’ve created previously.
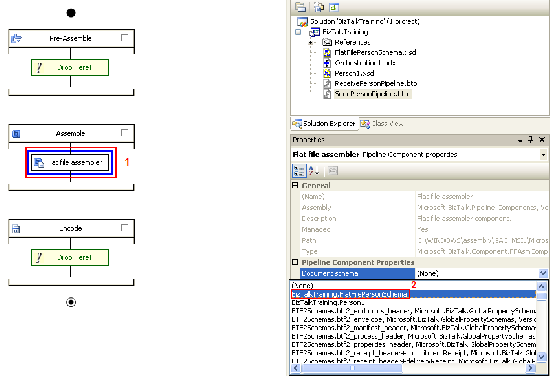
- Now you’ve configured receive pipeline for receive plain text and send pipeline for send to plain text.
- Add New Receive Pipeline.
- Modify orchestration.
- Back to Orchestration1.

- Change the schema from person1.xsd to FlatFilePersonSchema.xsd on ports and receive/send components.
- Break the green link between ports and receive/send components by right click on the line and select Delete.

- Now orchestration will look similar below.

- Change message type for msgPerson.
- On orchestration1, switch to Orchestration View.
- Select msgPerson.
- On Properties, change message type to “BizTalkTraining.FlatFilePersonSchema” which is the schema that we’ve created recently.

- Change message type on both ports.
- Click Request on RecvPersonPort. Be sure that you click on Request which inside the port, you’ll notice the highlight only around in Request not entire port.
- On Properties, change message type to “BizTalkTraining.FlatFilePersonSchema” which is the schema that we’ve created recently.
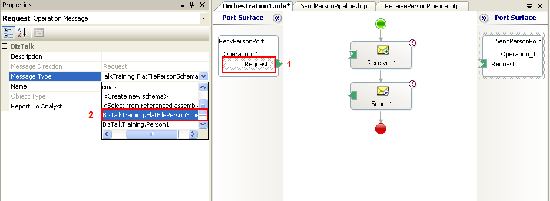
- Repeat change message type on SendPersonPort, too.
- Connect ports and receive/send components back.
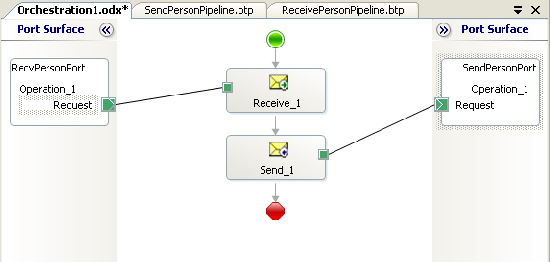
- Break the green link between ports and receive/send components by right click on the line and select Delete.
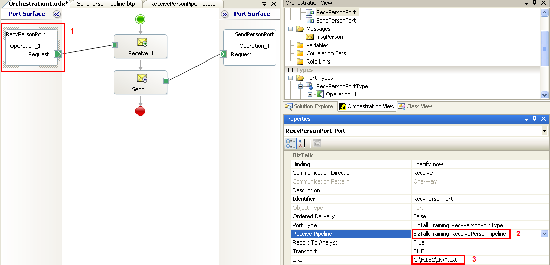
- Modify RecvPersonPort.
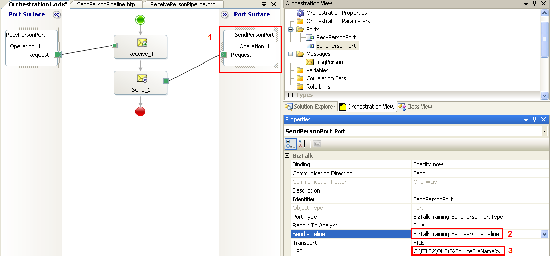
- Modify SendPersonPort.
- You’ve just configured to receive plain text (*.txt) from a folder to send to another folder as plain text.
- Deploy the project.
- Right click on Solution ‘BizTalkTraining’ and select Deploy Solution.

- The output window will show status of the deployment.

- If you have deployed this project before (in Training 1), you need to restart BizTalkServerApplication and refresh the application.
- Expand BizTalk Server 2006 Administration -> BizTalk Group -> Platform Settings -> Host Instances.
- Right click on the host which runs BizTalkTraining application (Host type as In-Process) and click Restart.
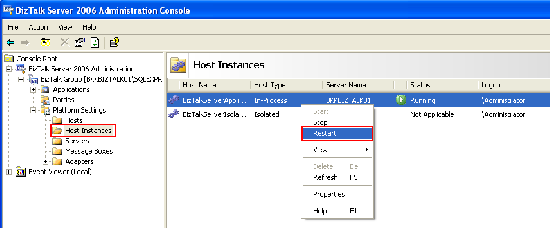
- Next, refresh the application by right click on BizTalk Training and select Refresh. Now your application on BizTalk is up-to-date.

- If you haven’t deployed this application before, go back to Training 1 for further detail.
- Now you can test by drop person1.txt to C:\FILE2\IN and wait for result come out in C:\FILE2\OUT.
Resources
You can download the example source code (zip file) at here.
The zip file contains
- BizTalkTraining folder which is the example project on Visual Studio 2005.
- FILE2 folder which contains IN and OUT empty sub folders for test receive and send message and person1.txt which is an example text message.
- binding.xml file which is a configuration file for import in BizTalk Administration.
Hello! My name is John! Your site is good!
Hi,
Excellent material. Appreciate your time and effort.
Was doing BizTalk Training-2 with BizTalk 2004. The solution builds and deploys fine but the xml file does not come up in the out folder.
I have used your FlatFilePersonSchema.xsd and added to the project. The rest I have created as mentioned.
Try to observe if the message is suspended in BizTalk Administration. Then, click on the message to see the error detail.
May be you could try to generate .xsd file by yourself.
Hi! I was surfing and found your blog post… nice! I love your blog. 🙂 Cheers! Sandra. R.
Hi, excellent tutorial. One question, what happens if you have multiple messages in your test file? would there be multiple xml files or 1 output file grouping all messages in the xml output
Thanks
Hi, Salam
On this example, I show how to receive a text file, convert to xml message and then convert back to text file again as an output. And this example will process only first three lines as a message.
But you can make it process multiple message if you want.
Hi, I am geting the following error in eventlog, Pls help.
There was a failure executing the receive pipeline: “BizTalkTraining.ReceivePersonPipeline, BizTalkTraining, Version=1.0.0.0, Culture=neutral, PublicKeyToken=403d31dd5713b7a7” Source: “Unknown ” Receive Port: “BizTalkTraining_1.0.0.0_BizTalkTraining.Orchestration1_RecvPersonPort_403d31dd5713b7a7” URI: “D:\Biztalk\training-2\IN\*.txt” Reason: Failed to get pipeline: BizTalkTraining.ReceivePersonPipeline, BizTalkTraining, Version=1.0.0.0, Culture=neutral, PublicKeyToken=403d31dd5713b7a7. Please verify that the pipeline strong name is correct and that the pipeline assembly is in the GAC.
nicely done
great article , good for beginners
Good article