- UML Modeling on NetBeans, Part 1: Installation
- UML Modeling on NetBeans, Part 2: Create a Use Case Diagram
- UML Modeling on NetBeans, Part 3: Generate code from UML Diagram
- UML Modeling on NetBeans, Part 4: Generate UML Diagram from Code
UML Modeling on NetBeans, Part 2: Create a Use Case Diagram
A Use Case diagram is useful when you are describing requirements for a system in the analysis, design, implementation and documentation stages.
This part will show you how to create a Use Case Diagram on NetBeans.
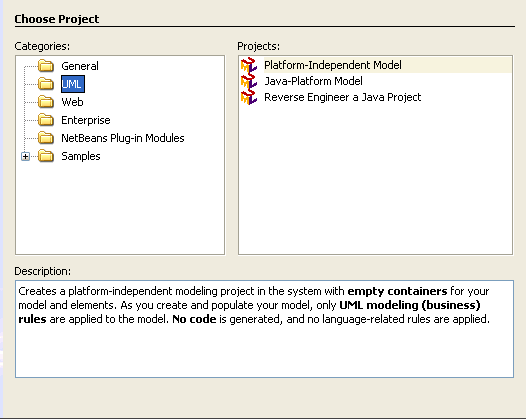
- Create New Project, File -> New Project…
- In Categories, select UML -> Java-Platform Model. Click Next.
If you can’t see UML, try go back to Part I: Installation
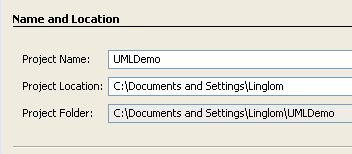
- Type ‘UMLDemo’ in project name or any name you want. Click Finish.
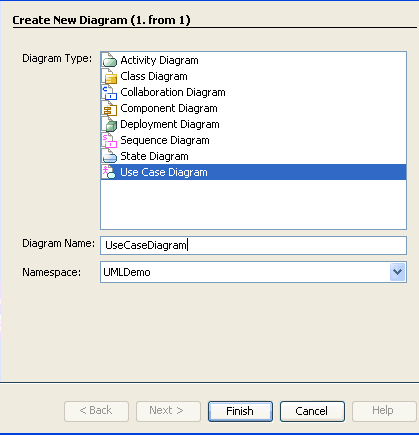
- New window appear, for Diagram type, select Use Case Diagram and named as UseCaseDiagram or any name. Click Finish.
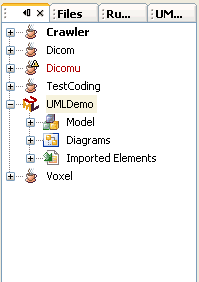
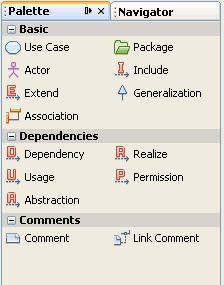
- Now the project has been created and you’ll see Palette window that contain tools for create Use Case Diagram. If you can’t see Palette window, try select tool on menu and choose Palette or press Ctrl + Shift + 8.
Create a Use Case elements
- To create a Use Case element, click on
 in Palette window and click on the empty space of diagram.
Then type ‘Rent items’ and press Enter.
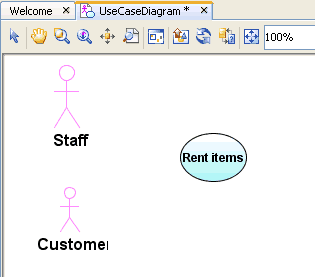
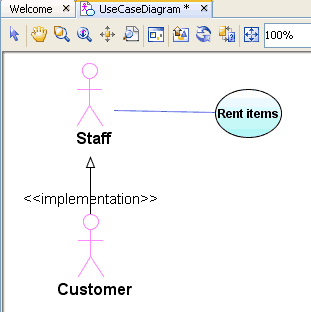
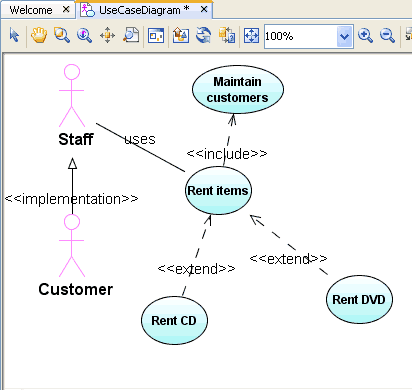
To change text on a Use Case, right click on the empty space to de-select a Use Case tool in Palette and click on the Use Case Diagram and type some text. - To create an Actor is the same as previous step. Create an actor named ‘Customer’ and ‘Staff’. The diagram will look similar below.
Create a link between elements
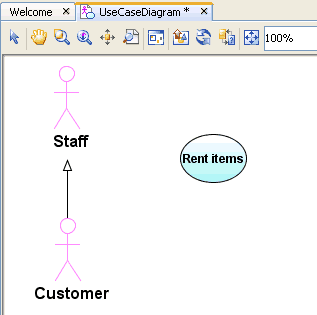
- Next, I’m going to create a link between two Actors. First, select
 in Palette window. Then click on the ‘Customer’ actor, the arrow appears. Then, click on ‘Staff’ actor.
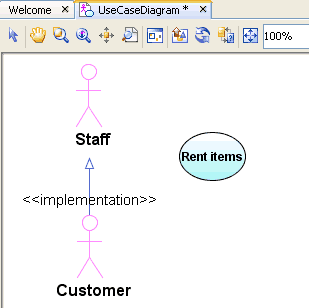
- To create a stereotype, simply click on the generalization link -> properties -> stereotype -> add -> type ‘implementation’ or stereotype name that you want. Click OK and Close.
- Next, I’m going to link between an Actor and a Use Case. Select
 in Palette window. Then, click on an Actor ‘Staff’ and a Use Case ‘Rent items’.
- Right-click anywhere in the empty space to de-select the Association link. You’ll see the link color become black.
- Point the cursor to the center of the line representing the link and right-click the Association link. Notice when select the link, color will become blue.
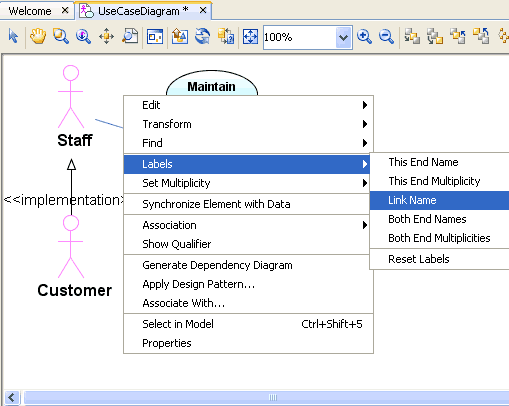
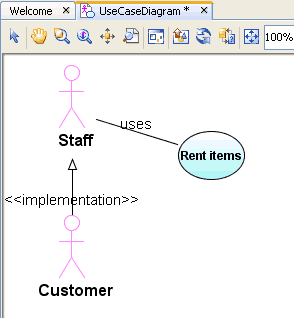
- Select Labels > Link Name from the pop-up menu. Type ‘uses’ and press Enter. The link will show as below.
Create a link between Use Case elements
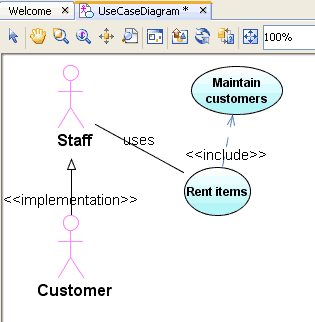
- Crate a new Use Case element name ‘Maintain customers’.
- Now, I’m going to create include link. Select
 in Palette window.
- Click once in the Rent items element, and click again in the Maintain customers element. The link appears as below.
- For extend link, use similar way. Try to create extend link as the figure below.
- To rearrange the diagram, click the Orthogonal Layout button
 on the Diagram toolbar.
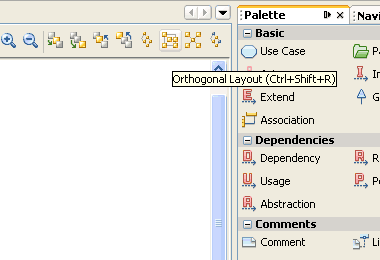
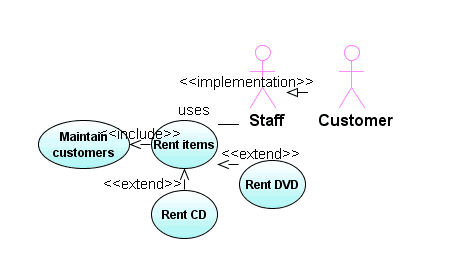
- Click Yes in the Layout warning dialog box. The diagram will be rearranged as below. You can try other arrangements that will suit you.
- Click Save to finish.
Export an diagram to image
- Now you have created a diagram, what if you want to save it to a general image file format? Currently, it can export in .jpg, .png, .svg formats.
First, select on the Diagram toolbar.
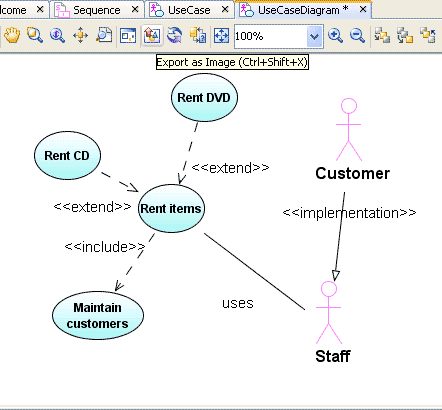
- Then, select Type of image and destination of file that you want. Click OK and you’re done!.

Now you have a basic to create a Use Case diagram so you can apply these to create other diagram.
Pretty easy, isn’t it?. In coming soon part, I will show how to generate code from the diagram.
The images for 2., 3. and 5. are not being displayed and my broswer doesn’t seem to be blocking them.
I haven’t even noticed that before!. I tested only on Firefox browser and it doesn’t show any error message.
But I’ve already fixed them.
Thanks for telling the broken links.
Great tutorial. I´d like to translate it to portuguese and give you credits. May I have your permition for do that?
To Ivan Fonseca,
Yes, you can as long as you conform with the license.
I’ve just put Creative Commons License (see bottom).
Feel free to ask if you have some problems.
Its getting there… I wish it had ‘align’ features, and that the arows behaved like ‘Enterprise Architect, from Sparx’….
–arrows…. 🙁
Very nice site! Good work.
Alignment tools are now available in NB 6 version of UML. See http://blogs.sun.com/conover/ for summary.
Hello, please help me.
I don’t understand what I am doing wrong. I have installed UML modul, I could open new UML project, create UserCaseDiagram, but I can not see the Palette window. I tried everything, CTR+SHIFT+8, or through menu, Window-Palette but nothing still I can not see 🙁
Thank you in advance for any other idea.
Hi, Lenka
Have you try NetBeans IDE 6.0? It has integrated UML module in this version. May be it can solve your problem.
Hi linglom,
I have tried 🙂 and it helped. thank you.
Then how to generate the code from Use Case at Netbeans.
You can generate code from a diagram by right click on the UML project in NetBeans and select Generate Code. Then, Generate Code window appears, you have to choose which target project to place the code. Click OK and you’re done.
Hi Linglom,
I might be wrong, but it seems to me that you used <> dependency instead of generalization. At least in UML 1.5, the extend dependency is described as “one use case can use the functionality of another use case”. I guess you mixed up with usage of ‘extend’ word in java – in UML it is represented by generalisation relationship, not by <> dependency. Rent CD is a special case of Rent Item, therefore you should use generalization.
Hi Mirek,
I’m not sure about UML concept now. But I’ve found this link which states that “The extends arrow (or extends edge) is drawn from a use case X to a use case Y to indicate that the process X is a special case behavior of the same type as the more general process Y.”
Reference: UML Use Case Diagrams: Tips
Can I use it to draw system boundary? I guess not. However, it’s the basic thing in use case diagram.
Cool…….No need to use RATIONAL ROSE NOW..
Than you in advance.