If you’re looking for a solution to backup your entire Windows 8 or 8.1 system, you may want to try System Image Backup, which is a built-in feature on Windows. It backup by create a snapshot of your system as system image to hard disk, external drive, network share, or DVD. And when you have problem with your system, you can restore Windows from the system image.
Here are pros/cons of System Image Backup.
Pros
- Built-in feature on Windows, no need to install any additional program.
- Easy to use.
- Can be backup to hard disk, external drive, network share, or DVD.
- Can be backup and restore on the same drive (different partition). But it is not recommended because if the disk fail, you will lose Windows system and the backup, too.
Cons
- Cannot restore specific files or folder. You have to restore entire image file.
- No compression on the backup file so it takes lots of disk space.
- Can keep only a system image on the drive. If you want to backup to the same drive again, it will replace the existing backup.
- When restore, destination partition must have disk space at least the image file.
No easy way for scheduling backup.
By considering pros/cons of System Image Backup, it is not suitable for routine backup or home user. But it may be useful if you’ve just installed fresh Windows and want to do full system backup. Or if your company has lots of PCs with same hardware model, you can use System Image Backup to create an image file and it can be used for recovery those PCs.
If you want to backup only some files or you want to keep different versions of backup files, you should use File History instead.
In this example, I show how to create backup image of Windows 8.1 system on C drive to another hard disk D drive and restore the backup image back to Windows system with System Image Backup.
Watch on YouTube
Backup and restore Windows 8/8.1 with System Image Backup
Restore Windows 8/8.1 with System Image Backup using Windows DVD
Step-by-step
Backup Windows 8.1 with System Image Backup
- Open File History, there are 2 methods which are as following:
-
- Right-click on Windows icon at bottom left of the screen.
- Select Control Panel.
- Select System and Security.
- Click File History.
-
- Press Windows + Q keyboard shortcut.
- Type file history in the search box.
- Click File History.
-
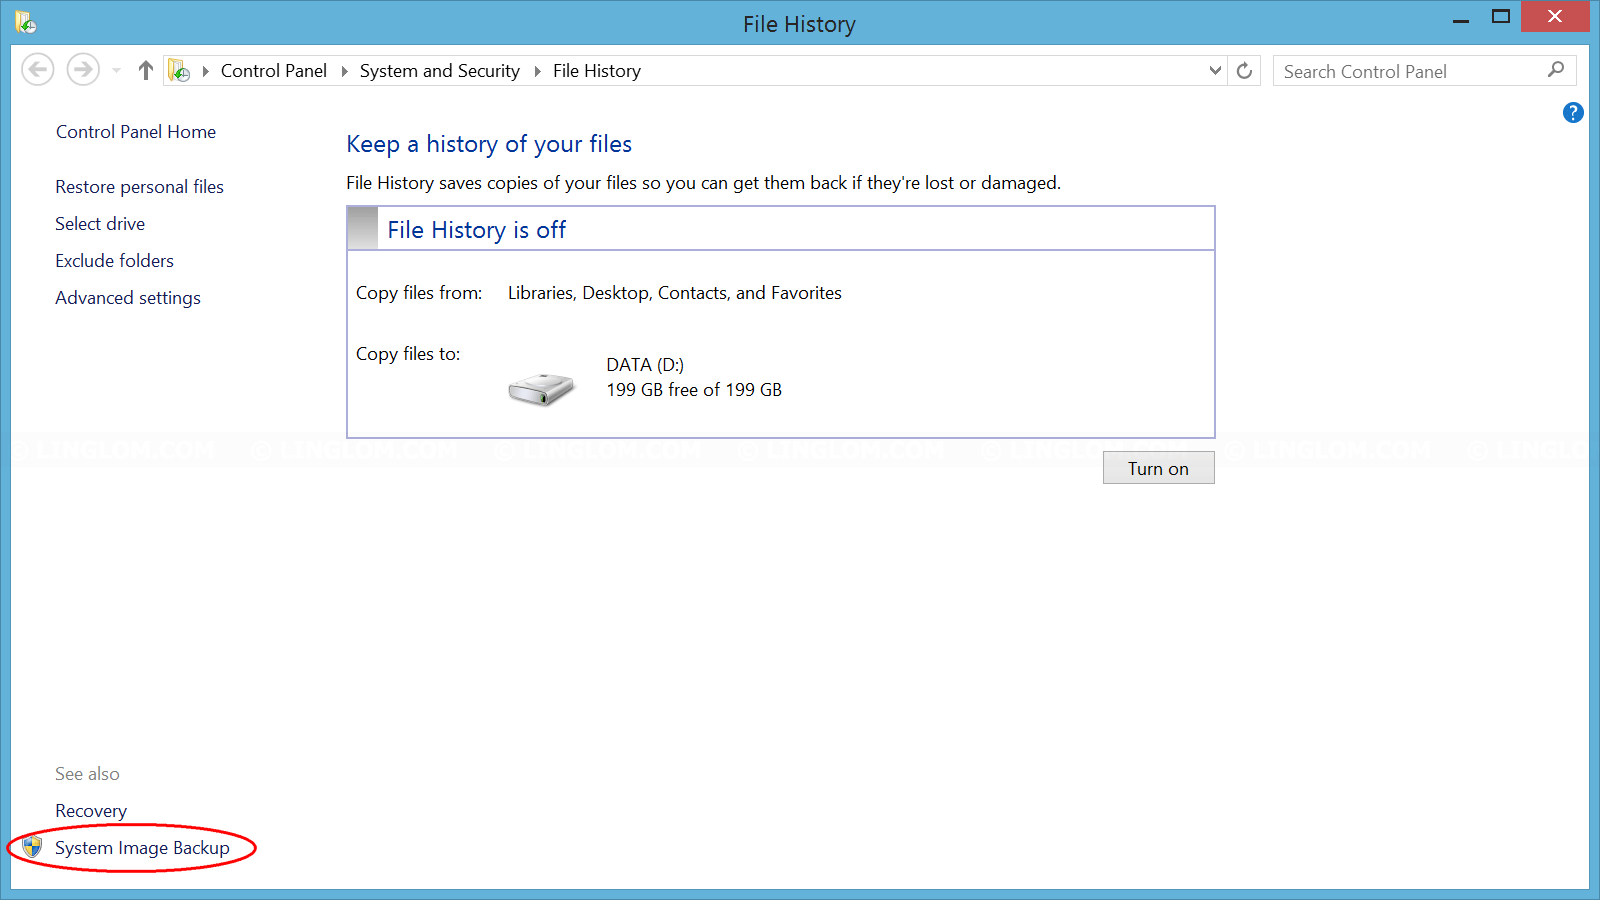
- On File History, select System Image Backup at bottom left of the window.
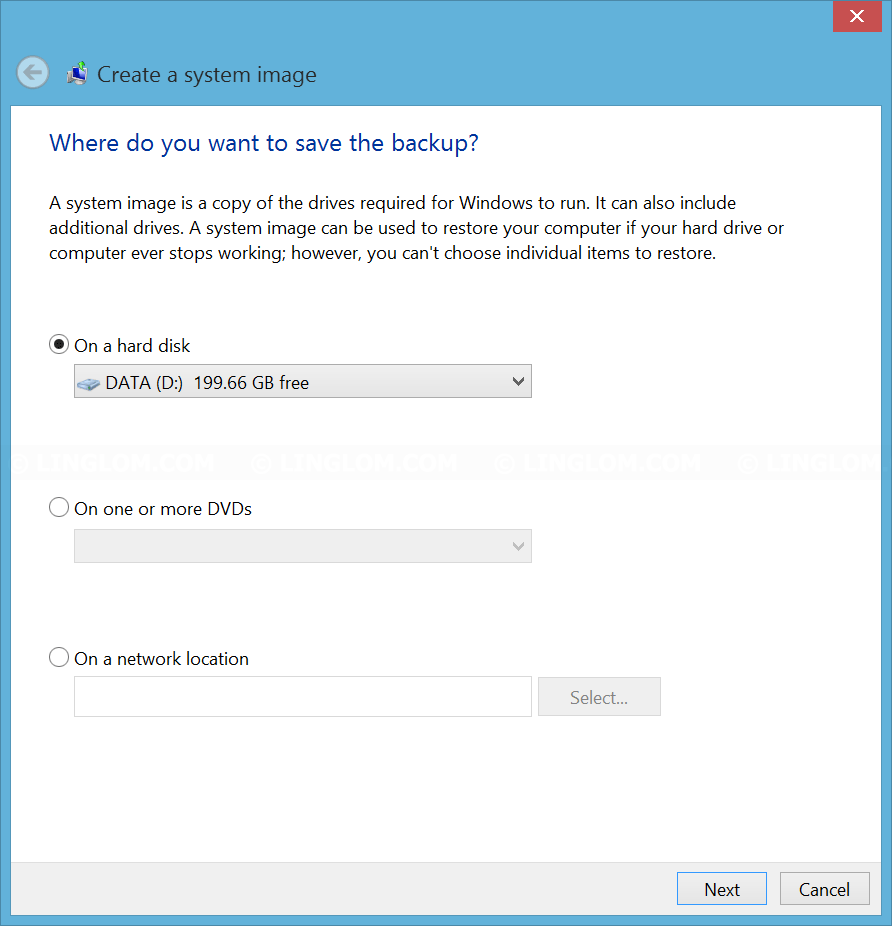
- On Create a system image, you can choose to save the backup to a hard disk, DVD, or network drive. In this example, I select to another hard disk on ‘D’ drive and click Next.
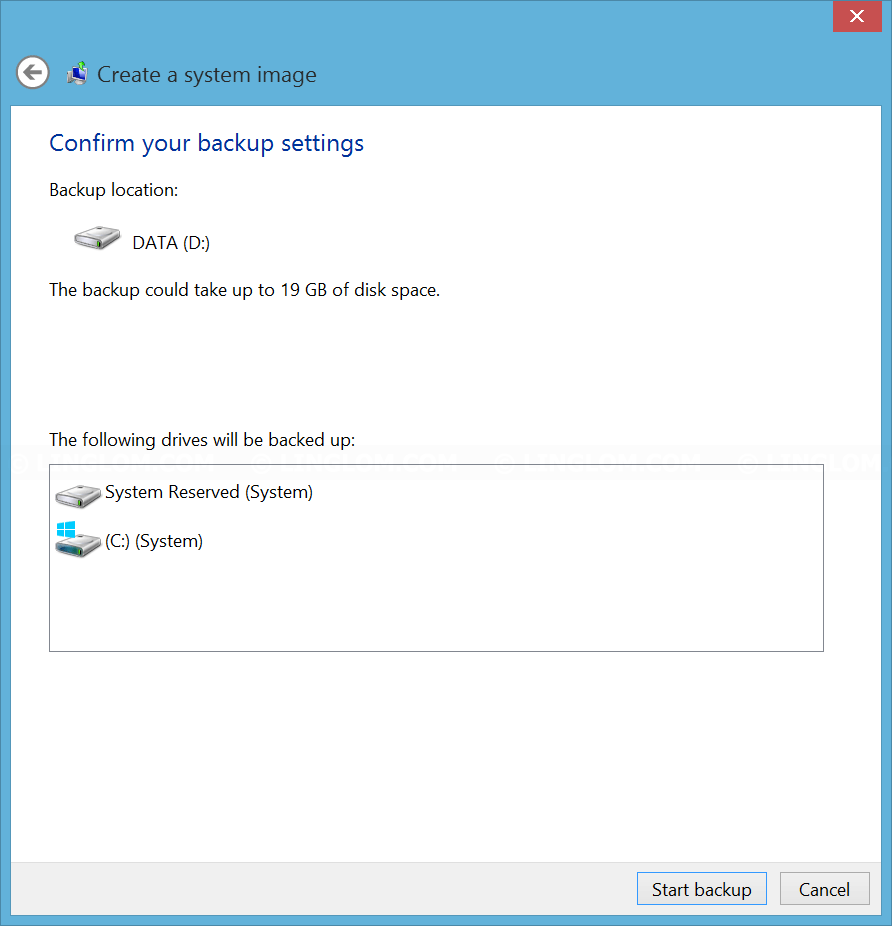
- Click Start backup to begin the process.
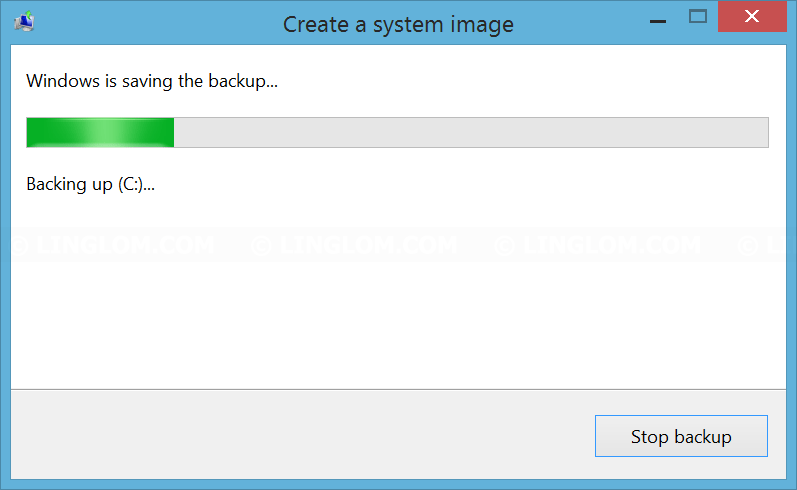
- In this example, it took about 24 minutes to create backup image.
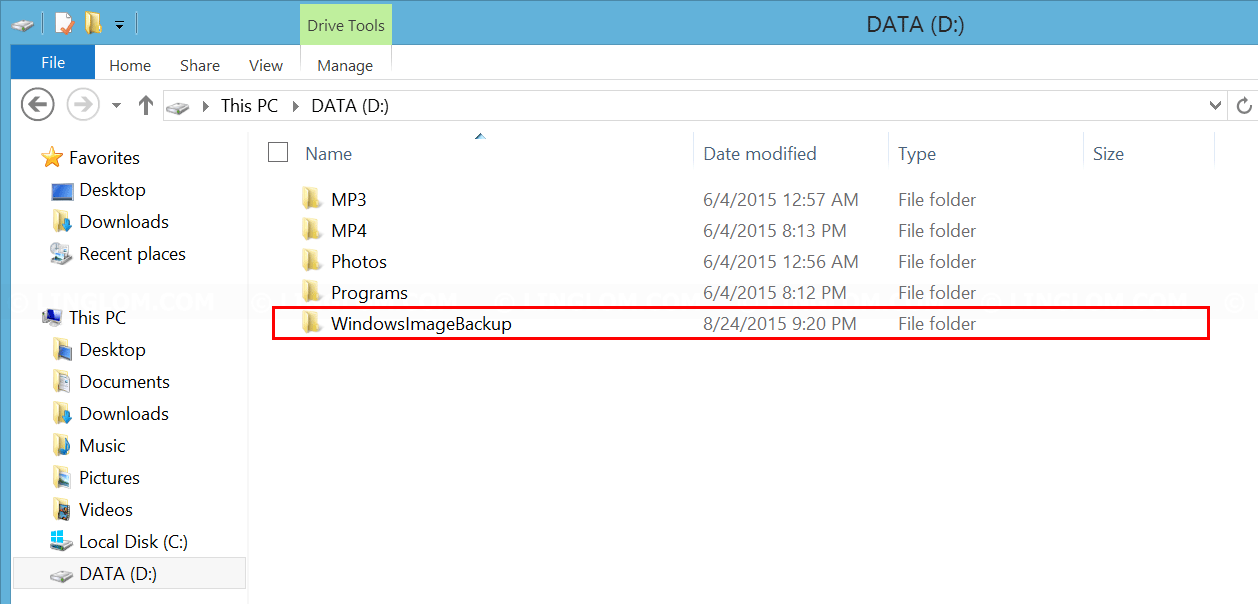
- When finishes, you get WindowsImageBackup folder as the backup image file.
Restore Windows 8.1 with System Image Backup
To restore Windows from system image, you need to boot into Windows Recovery Environment (Windows RE). There are two methods which are as following:
- Use Windows installation DVD or recovery disc.
This method should be used when you can’t boot to Windows as usual. Check this video Restore Windows 8/8.1 with System Image Backup using Windows DVD for details guide. - Enter recovery mode from Windows.
If you can access Windows on your computer, you can follow below guide to enter recovery mode and restore Windows from the backup image.
- To enter recovery mode from Windows 8.1 desktop,
- Press Windows + I keyboard shortcut.
- Left-click on the power switch icon.
- Hold Shift key and click Restart.

- Windows is now boot into recovery environment, select Troubleshoot.
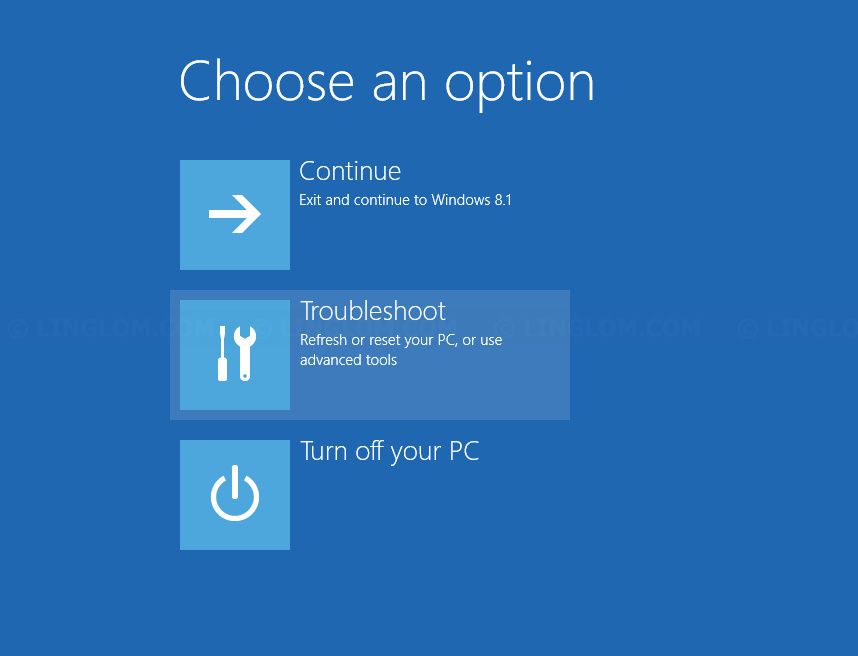
- Next, select Advanced options.
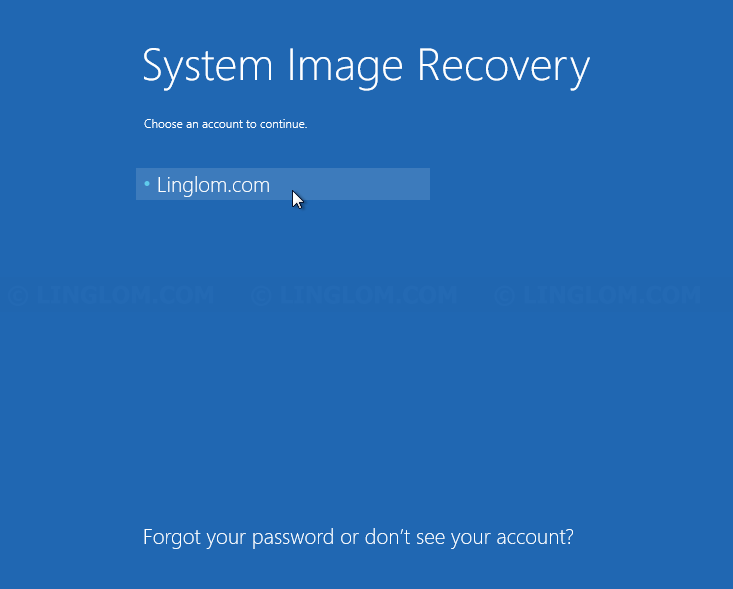
- Select System Image Recovery.
- Windows is now booting into system image recovery, select your user account.
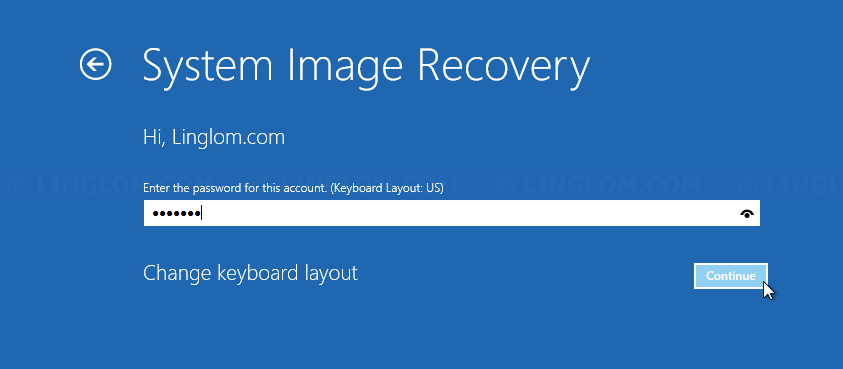
- Enter password for the user account and click Continue.
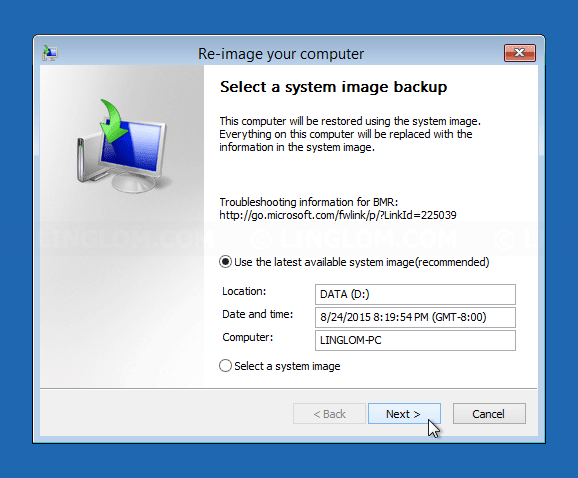
- Select which backup image you want. The most recent backup image is selected as default option. Then, click Next.
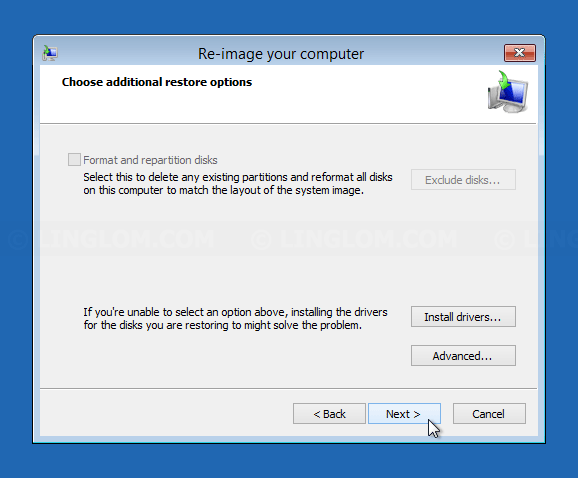
- On additional restore options, click Next to continue.
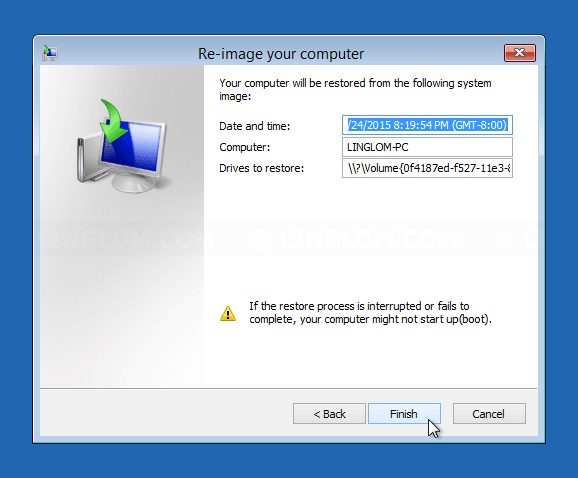
- Click Finish.
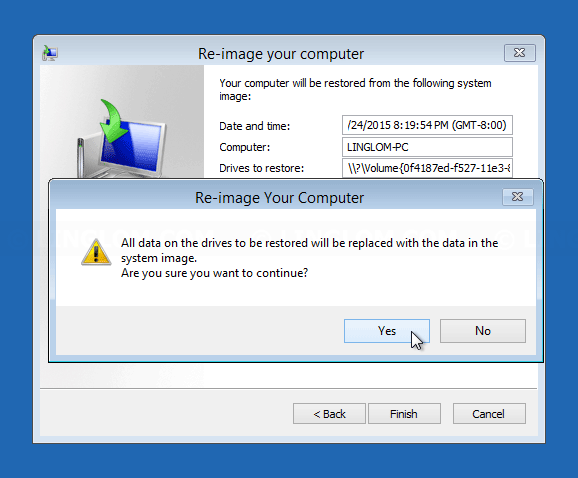
- Click Yes to confirm an begin the process.
- In this example, it took about 21 minutes to restore backup image from D drive to C drive.
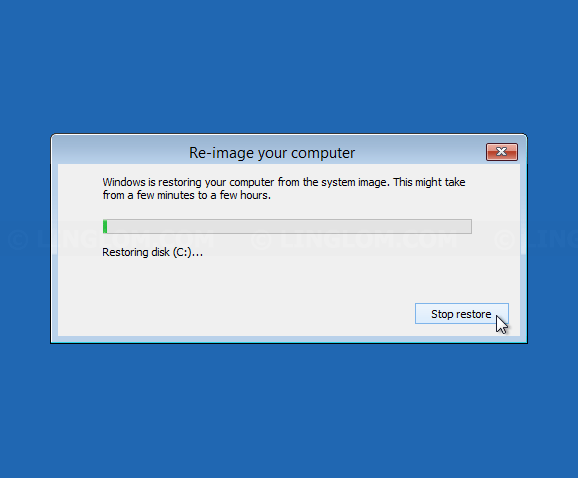
- Finally, you get Windows in the same state as the backup image.