- Getting started with Microsoft Windows Server Update Services 3.0, Part 1: Introduction
- Getting started with Microsoft Windows Server Update Services 3.0, Part 2: Requirement
- Getting started with Microsoft Windows Server Update Services 3.0, Part 3: Installation
- Getting started with Microsoft Windows Server Update Services 3.0, Part 4: Configuration
- Getting started with Microsoft Windows Server Update Services 3.0, Part 5: Configure Client
- Getting started with Microsoft Windows Server Update Services 3.0, Part 6: Disconnected network (1)
- Getting started with Microsoft Windows Server Update Services 3.0, Part 7: Disconnected network (2)
In this part, I’ll show how to install software requirements for WSUS on Windows Server 2003.
Requirements
- Windows Server 2003 Service Pack 1 or 2.
- Microsoft Internet Information Services (IIS) 6.0.
- Microsoft .NET Framework Version 2.0 Redistributable Package.
- Microsoft Management Console 3.0 for Windows Server 2003 (KB907265).
- Microsoft Report Viewer Redistributable 2005.
Note:
- All these software requirements can be downloaded from Microsoft.
- WSUS can be install on Windows Server 2008, too. But the requirement will be different. And I’m not cover in this article.
Sections
Step-by-step
Install software requirements
- I’ve already install Windows 2003 Server and service pack 2on an empty server. Next, I’ll install IIS 6.0 with ASP.NET.
- Add Application Server role. Open Manage Your Server by click Start -> Program -> Administrative Tools -> Manage Your Server. Click Add or remove a role.

- On Preliminary Steps, click next.

- On Configuration Options, select Custom configuration. Click next.

- On Server Role, select on Application server (IIS, ASP.NET) and click next.

- On Application Server Options, select Enable ASP.NET and click next.

- On Summary of Selections, click next to proceed the configurations.

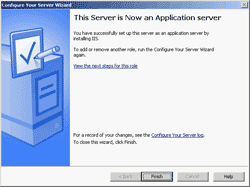
- Now this server is an application server now.

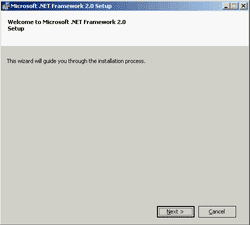
- Next, I’ll install Microsoft Dot Net Framework 2.0.

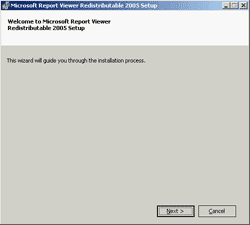
- Then, I’ll install Microsoft Report Viewer Redistributable 2005.

- Now all the software requirements have benn installed.
Before you begin the WSUS installation
As state in the “Deploying Microsoft Windows Server Update Services 3.0 SP1” that recommends you to check the permission before proceed WSUS installation.
Quote from the document on Page 33-34.
Before you start WSUS Setup, you should make sure that the root of the drive where WSUS stores updates has certain permissions. WSUS Setup does not modify permissions on the root drive where you store updates, but this drive may not have appropriate permissions set. For example, security tools may have been used to strip away default permissions from the disk before the installation of WSUS. To manage this problem, use the following procedure to check the drive and directories where updates are stored to ensure permissions are set correctly.To check permissions on the drive and directories where updates are stored
- Double-click My Computer, right-click the drive where updates are stored, and then click Sharing and Security.
- Ensure that the drive has read permissions for the built-in Users group or NT Authority\Network Service.
- Ensure that the root folder on the drive also has read permissions for NT Authority\Network Service.
- Ensure that the content directory itself (usually
: \WSUS\WsusContent) has read permissions for NT Authority\Network Service. These permissions should have been set by the installation program.The default Web site needs to allow anonymous access (that is, read access) by the IUSER_servername account. Some applications, notably Windows SharePoint Services, will remove anonymous access.
To check for anonymous access to the default Web site
- Go to the Internet Information Services (IIS) Manager, click the server name, click Web Sites, and then right-click the WSUS Web site.
- In the context menu select Permissions.
- In the Security tab you should see the Internet Guest Account listing.
- If you do not see this account, you will need to add it.
- Add a user account named IUSR_serverName to the local machine, where serverName is the name of the server.
- Give this account the following permissions: Read & Execute, List Folder Contents, and Read. You should deny write access to this account.
- Return to IIS Manager, right-click the WSUS Web site, and then click Permissions.
- Add the newly-created user to this Web site.