In this article, I will show how to configure boot menu to add Safe mode as another boot entry on Windows 10.
Note: Modifying boot menu incorrectly could render your PC unable to boot into Windows.
Watch on YouTube
Step-by-step
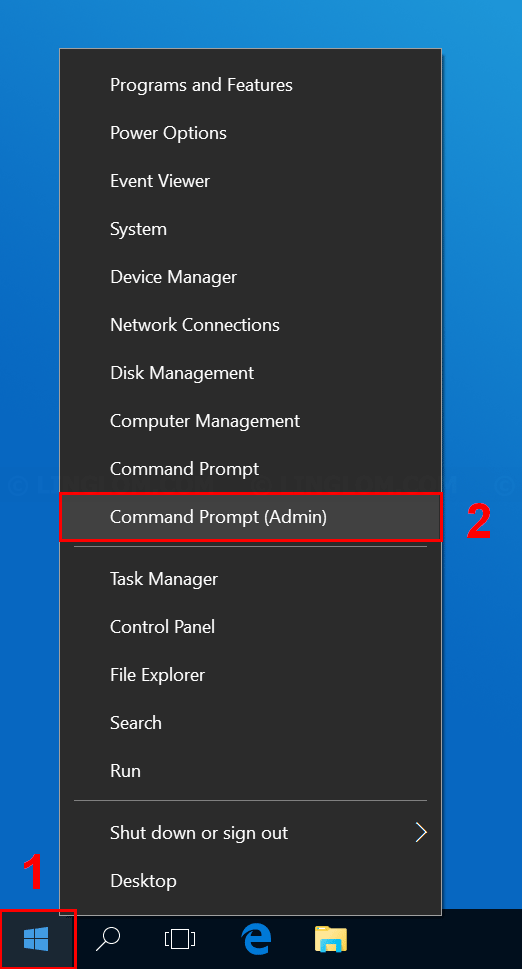
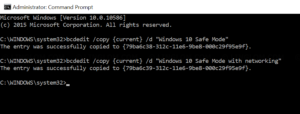
- On Windows desktop, right-click Windows icon at bottom left and select Command Prompt (Admin).

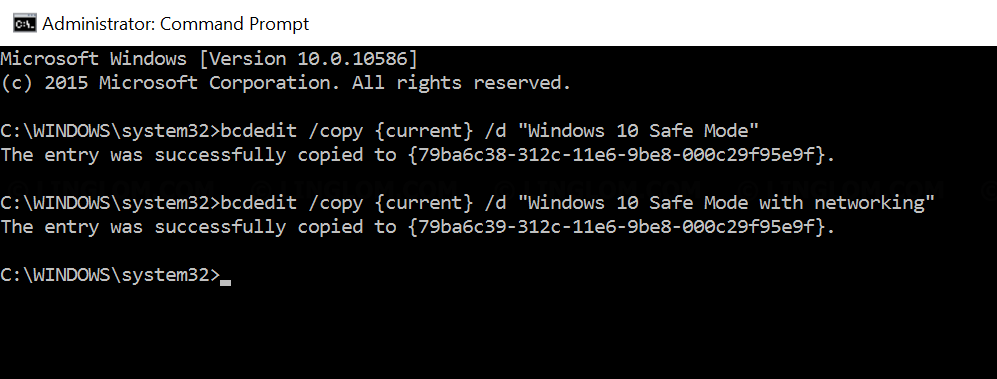
- Type this command to duplicate the current boot entry. You can change name of this new entry as you want. This will be an entry for minimal Safe mode.
bcdedit /copy {current} /d "Windows 10 Safe Mode"And I will duplicate another boot entry. This will be an entry for Safe mode with networking.
bcdedit /copy {current} /d "Windows 10 Safe Mode with networking"When finishes, close this window.
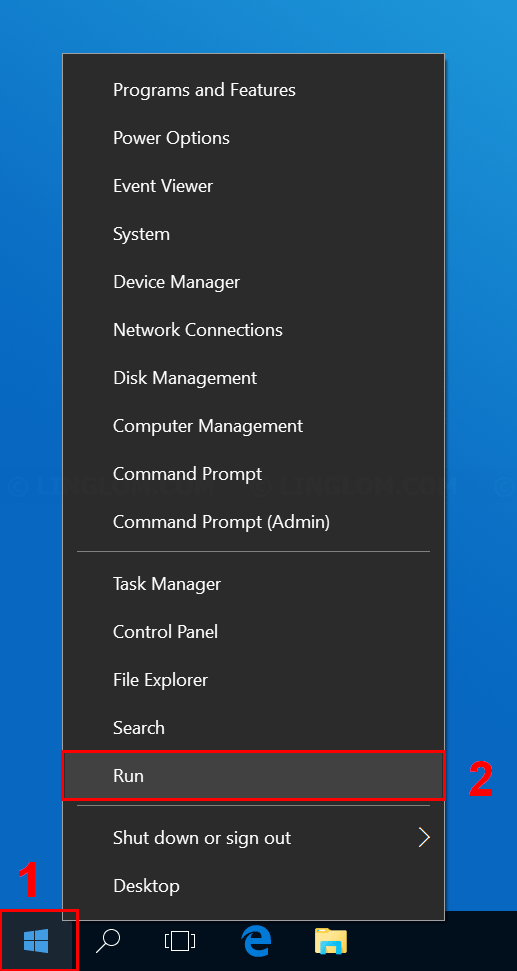
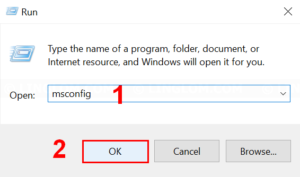
- Next, right-click Windows icon at bottom left and select Run.
Note: You can press Win + R keyboard shortcut to open Run window.

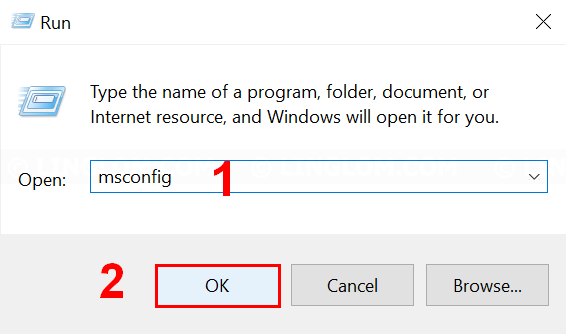
- Type msconfig and click OK.
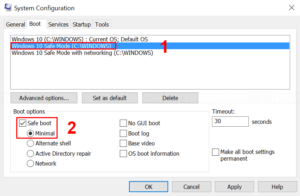
- On System Configuration window, select Boot tab. You will see boot entries on this system. And configure the second entry for minimal Safe mode.
- Select the second entry, Windows 10 Safe Mode
- Check the option Safe Boot
- Select Minimal
- Next, configure the third entry for Safe mode with networking
- Select the third entry, Windows 10 Safe Mode with networking.
- Check the option Safe Boot
- Select Network
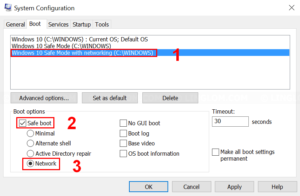
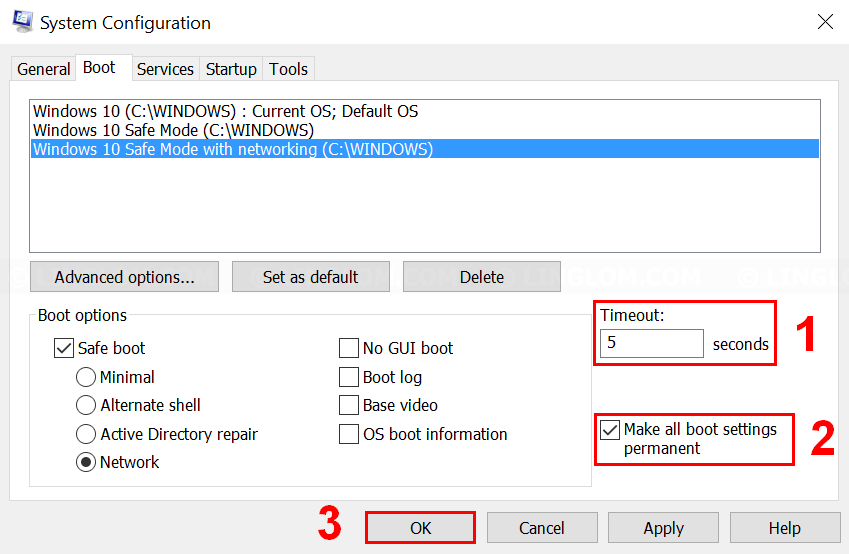
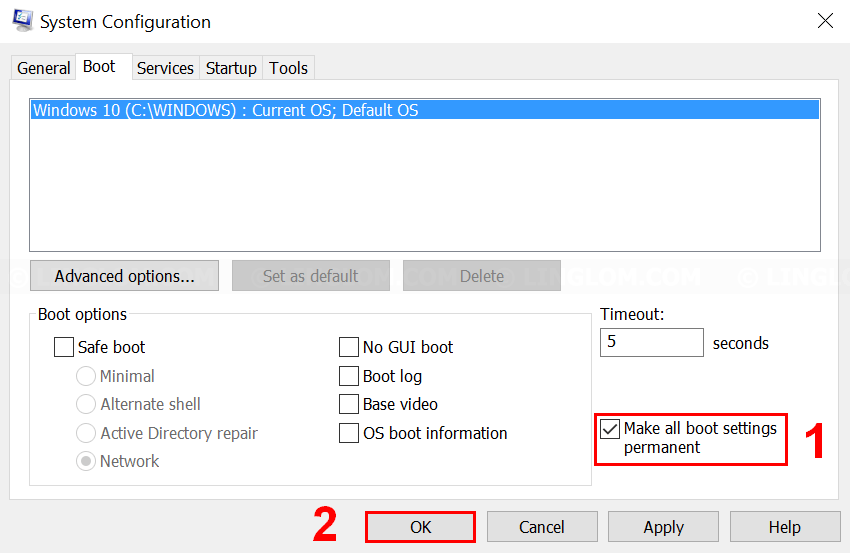
- By default, the time to choose these options is 30 seconds, you can change this at Timeout field. In this example, I will:
- Set Timeout to 5 seconds
- Check the option Make all boot settings permanent
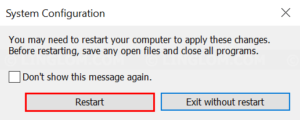
- Click OK

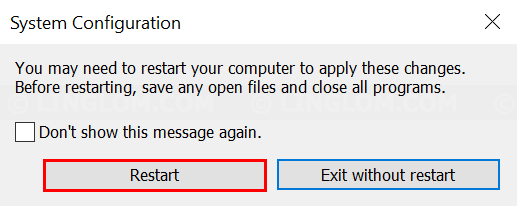
- Click Yes to confirm.

- Click Restart to reboot your system.
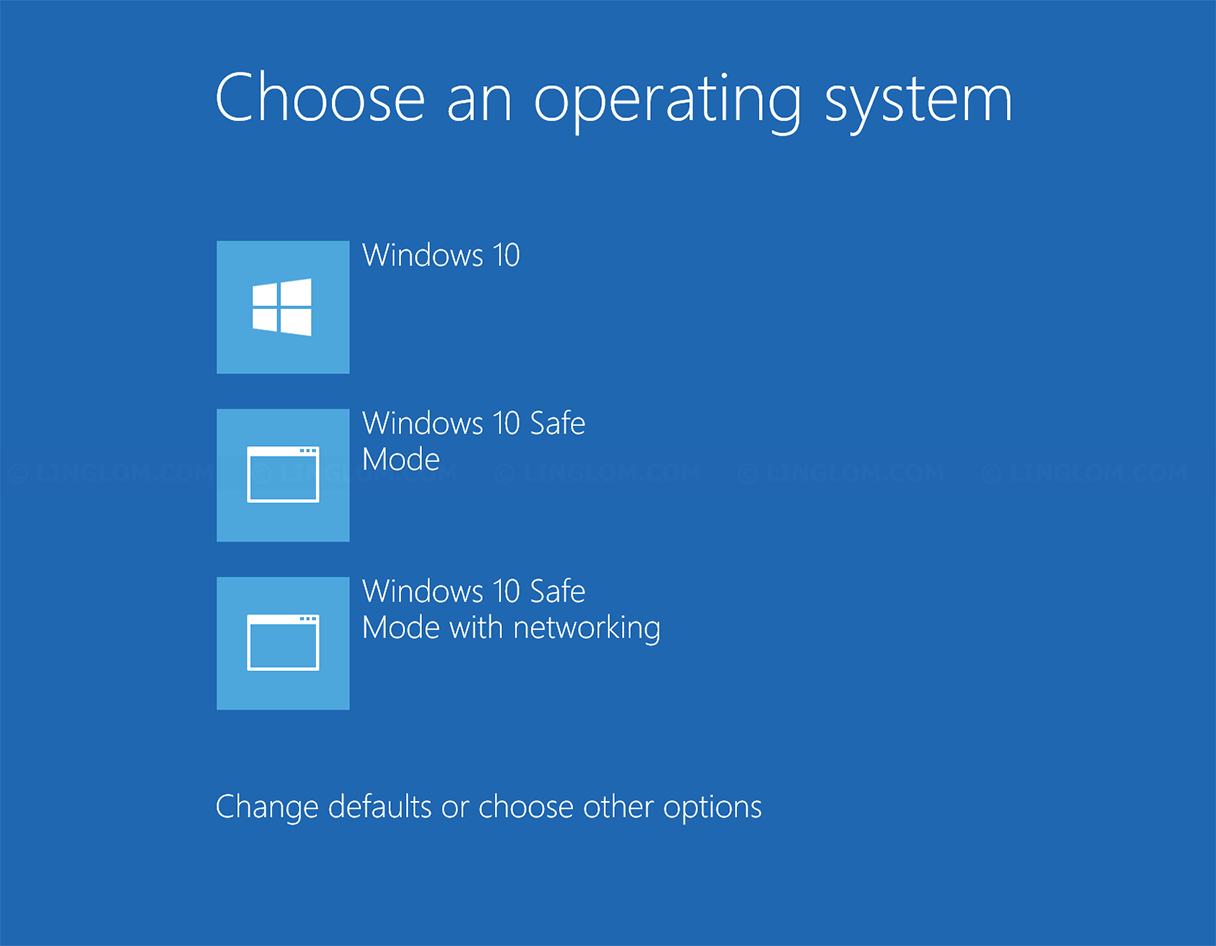
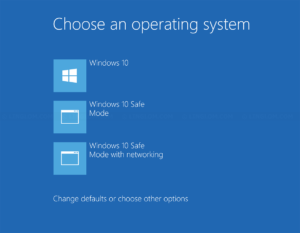
- Then, you will see this screen every time your system boots which you can choose to boot Windows normally, enter Safe mode, or troubleshoot system.
Note: If you don’t choose any option, the default option will be selected automatically after timeout expires.
- If you want to remove custom boot menus, open System configuration and delete those entries.
- On Windows desktop, right-click Windows icon at bottom left and select Run
- Type msconfig and click OK
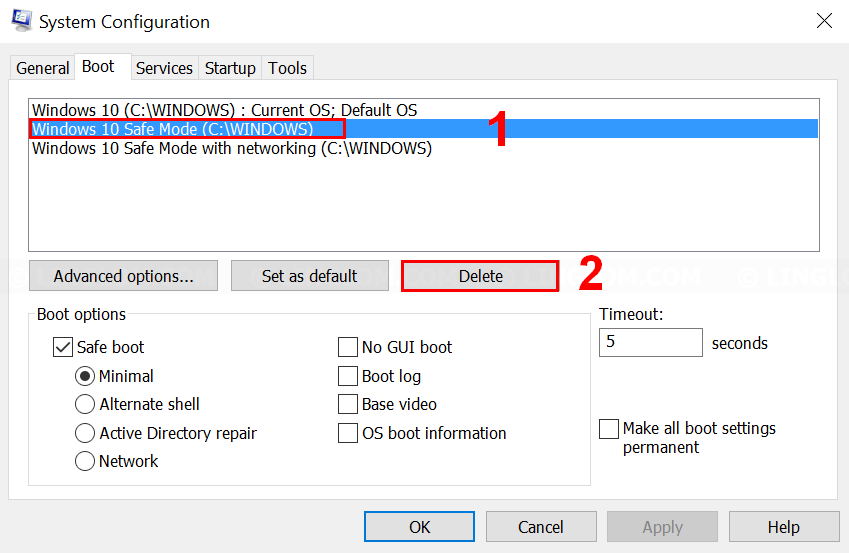
- On System Configuration, select Boot tab
- Select custom entry that you want to remove and click Delete.
Note: Make sure that you don’t delete the Current OS or Default OS entry.

- When all custom entries are deleted, check the option Make all boot settings permanent and click OK. Click Yes and click Restart to reboot your system.