Note: System Restore does not affect your documents, images, or other personal data so you cannot use it to backup your files.
In this article, I will show how to enable System Restore, create a restore point, and restore Windows to an earlier point in time on Windows 10.
Watch on YouTube
Section
- Enable System Restore and manually create a restore point
- Do a System Restore in Windows 10
- Do a System Restore in Advanced Startup (at boot)
Step-by-step
Enable System Restore and manually create a restore point
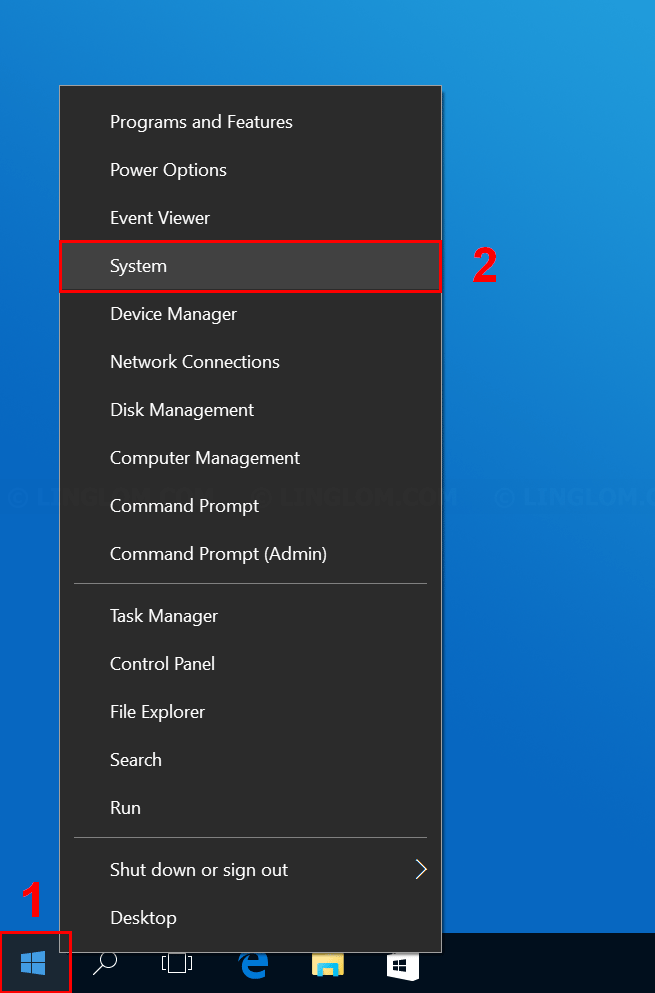
- On Windows desktop, right-click Windows icon at bottom left and select System.
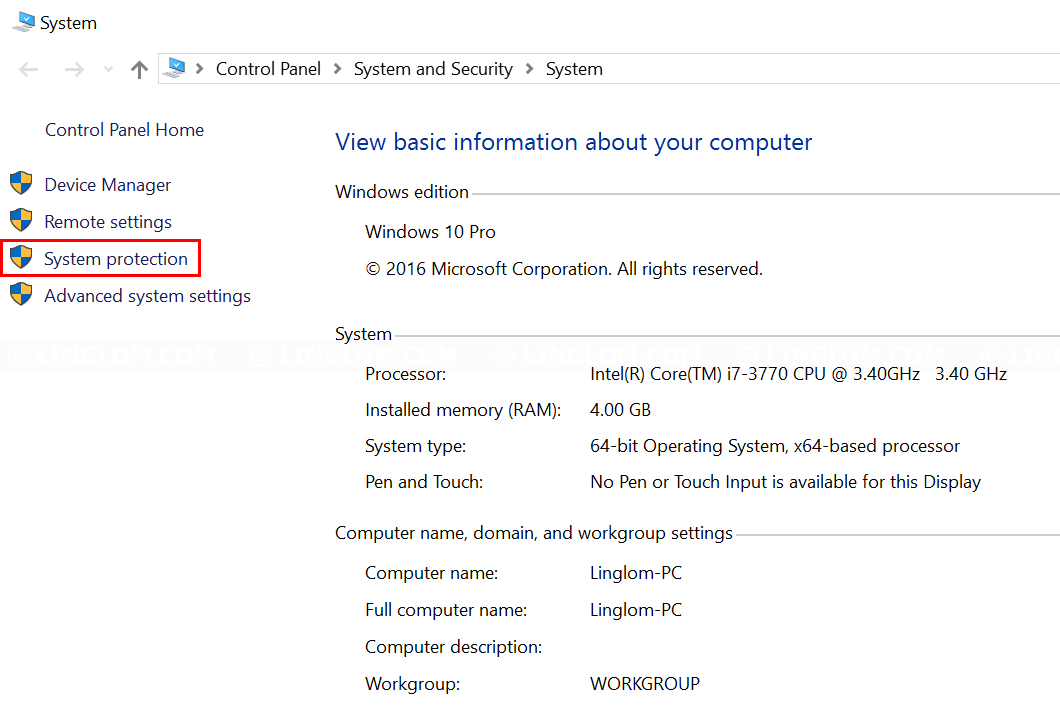
- Click System Protection on the left menu.
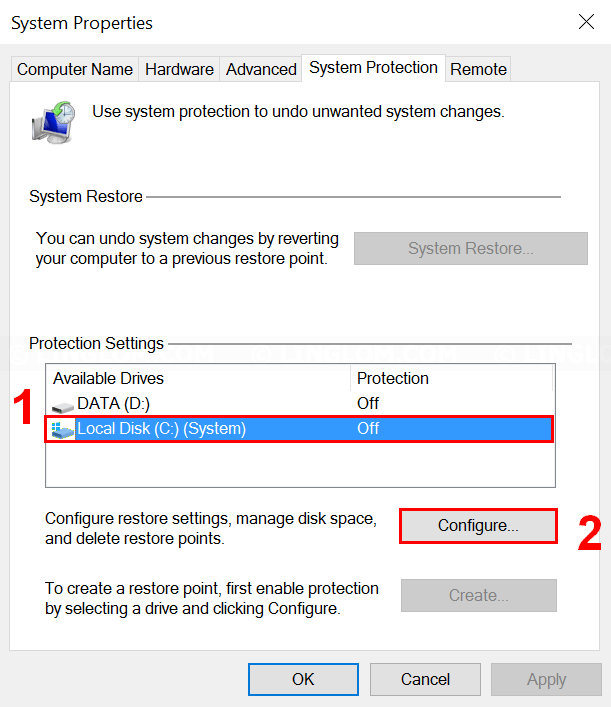
- System Restore is enabled by default on system drive which usually is C drive. If it is disabled, you can enable it by select the system drive and click Configure.
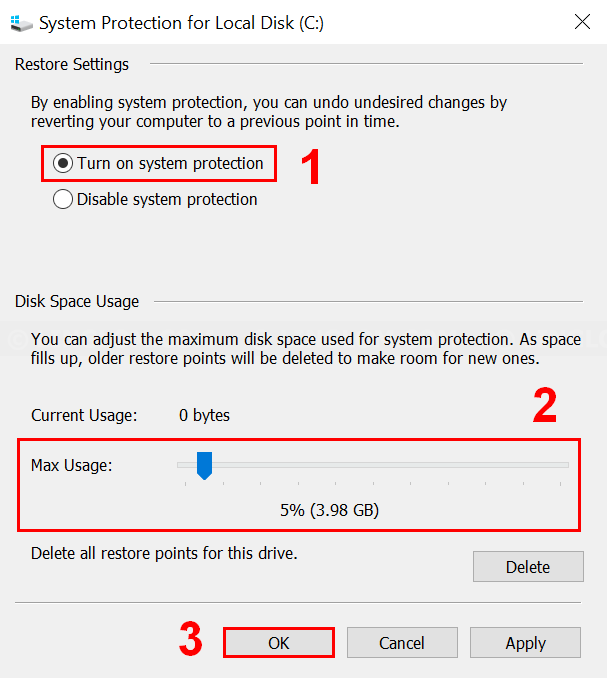
- Select Turn on System Protection and you can choose how much disk space on this drive for System Restore (4 or 5% should be enough). Then, click OK.
- System Restore is now enabled on this drive, but there is no restore point yet. You can manually create a restore point by click Create.
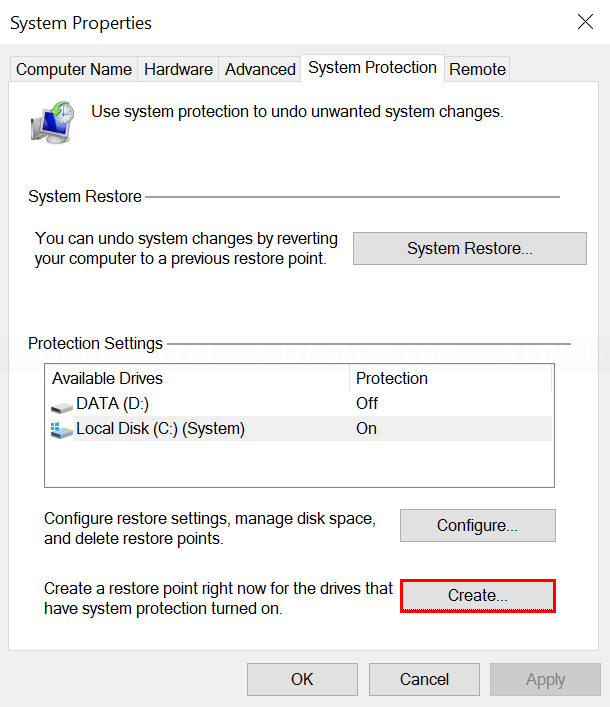
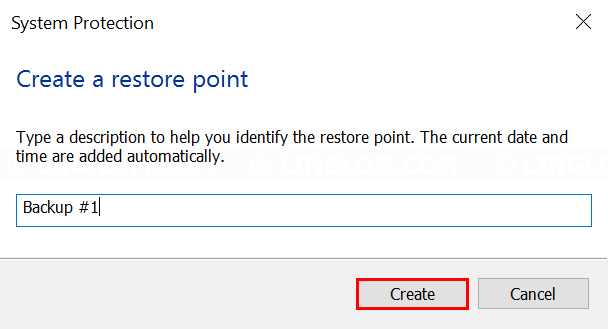
- Enter description of this restore point and click Create.
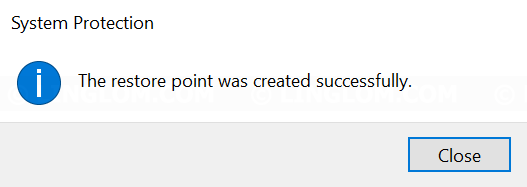
- You have finished creating a restore point which can be used to restore Windows when there is a problem with your system later.
Do a System Restore in Windows 10
In this example, I have adware which slow down my system, so I will restore my system to an earlier point which doesn’t has this problem.
- Open System Protection and select System Restore.
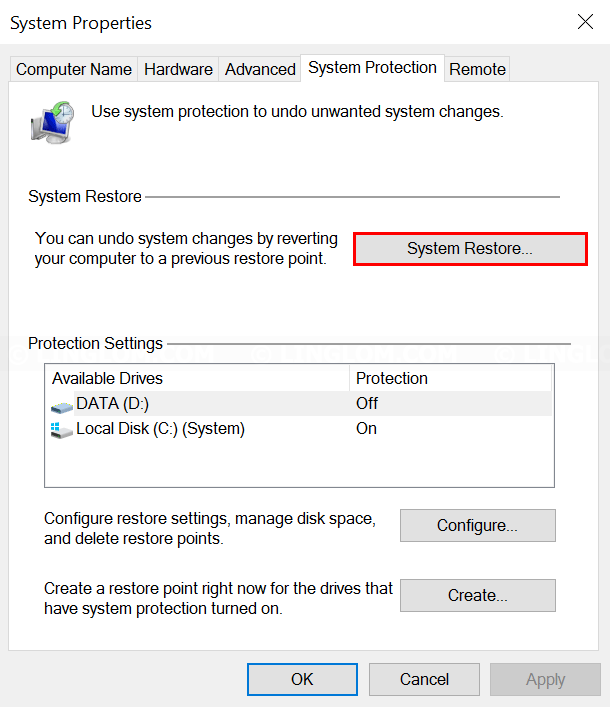
- On System Restore, click Next.
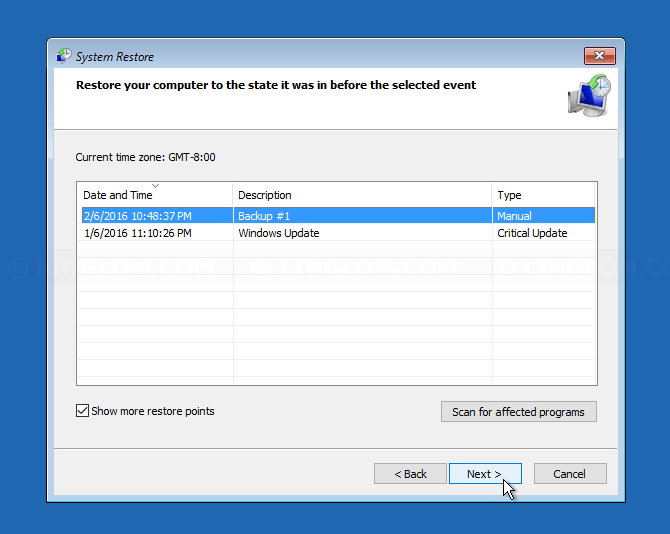
- Here you see restore points which you can choose to restore your system. Select a restore point. If you don’t know which one to choose, I suggest to select the most recent one. Then, click Next.
Note: You can click Show more restore points which will display more earlier points. And you can also click Scan for affected programs to display list of programs that will be deleted or restored if you select this restore point.

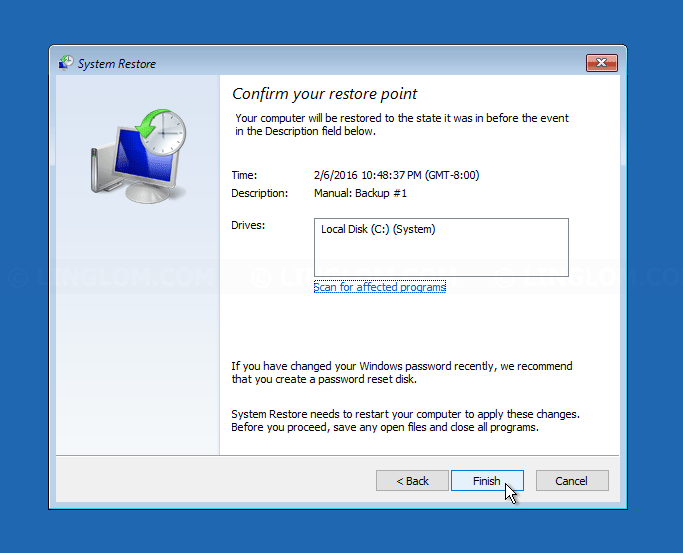
- Click Finish.
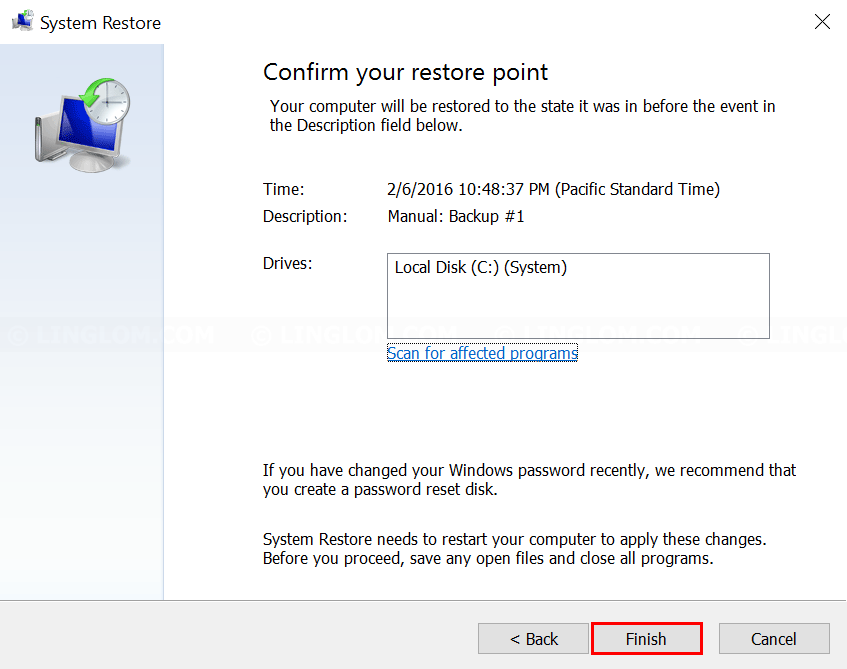
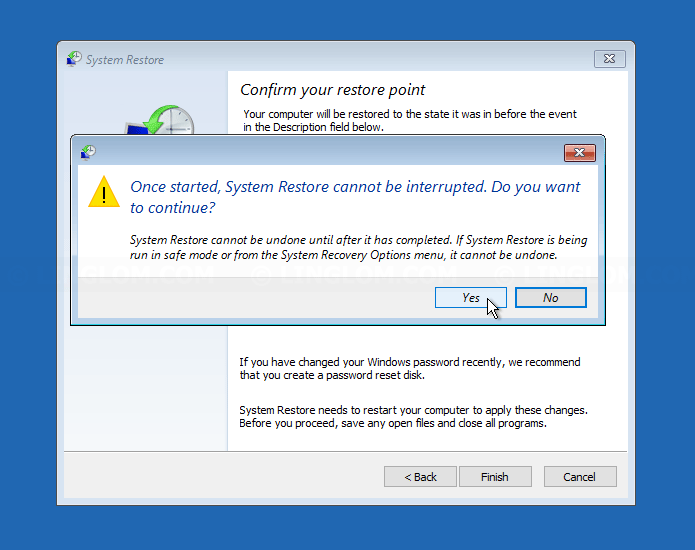
- Click Yes to confirm.
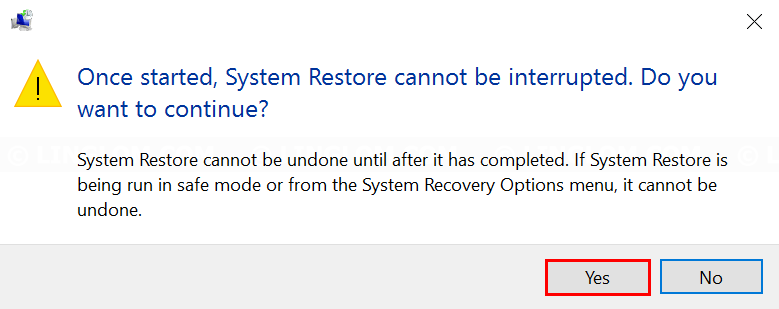
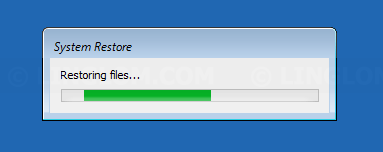
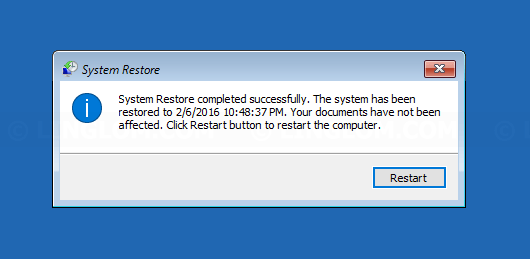
- In this example, it took about 10 minutes to restore my system.

- When it finishes, you PC will be restarted and you should have your system as it was at the time it was restored to.
Do a System Restore in Advanced Startup (at boot)
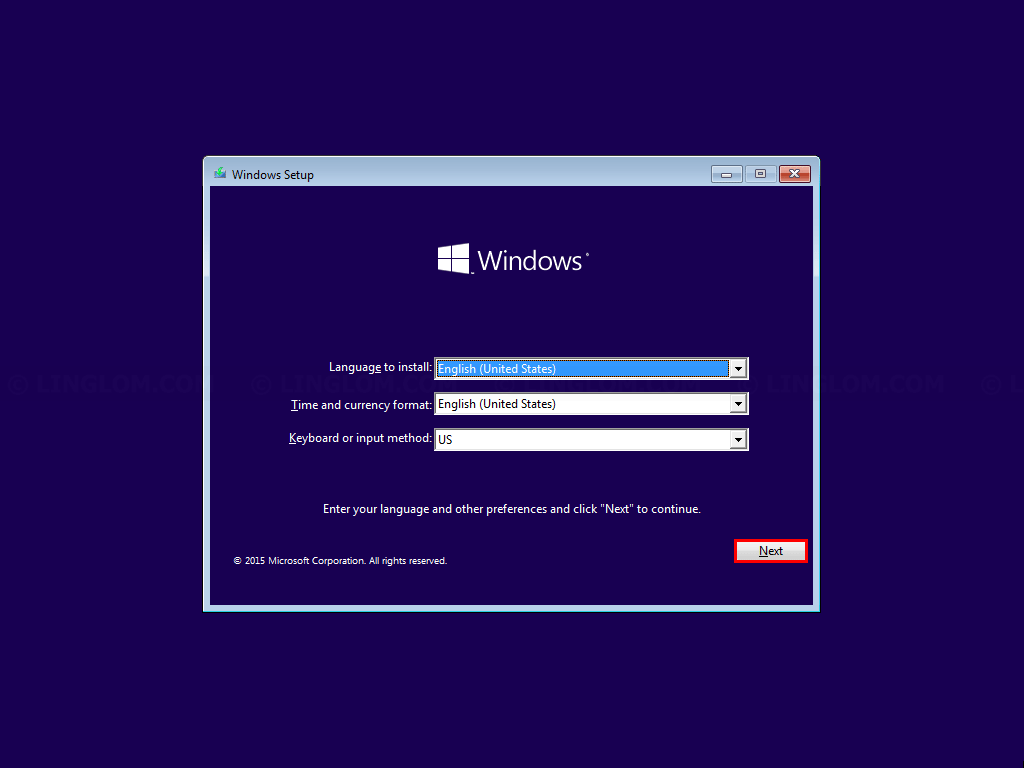
If you have problem with your system and you can’t boot into Windows, you could try restore your system with System Restore in Advanced Startup by boot from Windows installation media or recovery drive.
- Insert Windows installation media and reboot your PC.
Note: If it doesn’t boot into the media, you may have to configure boot order in BIOS to boot from the DVD or USB. - On Windows Setup, click Next.
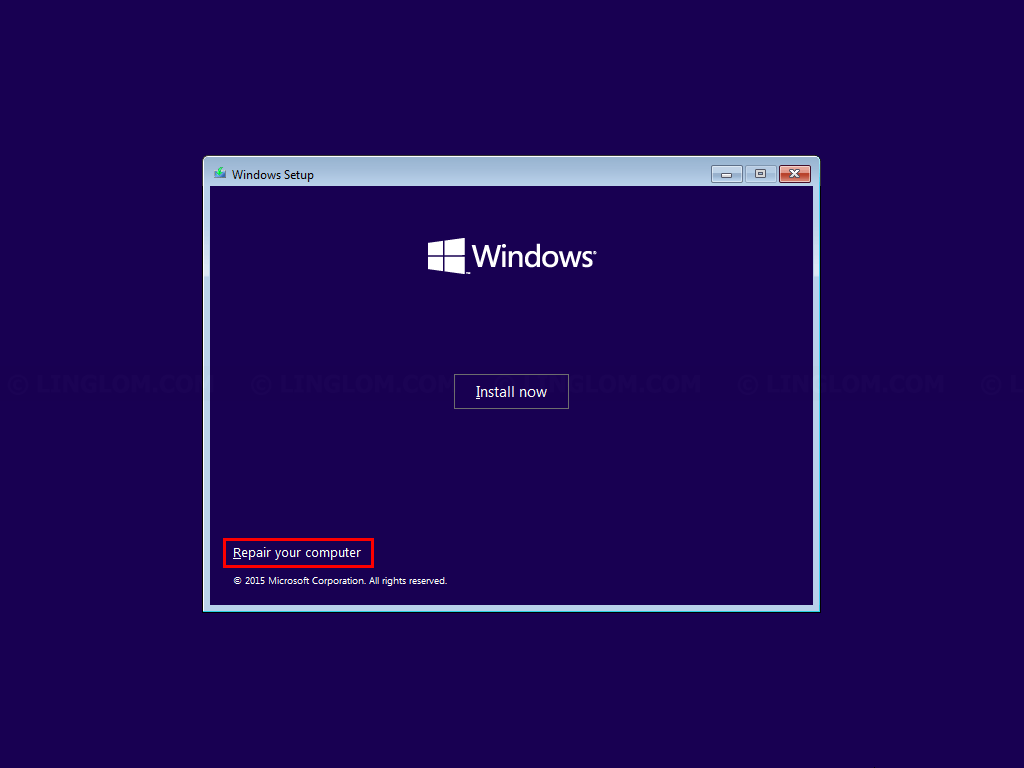
- Click Repair your computer.
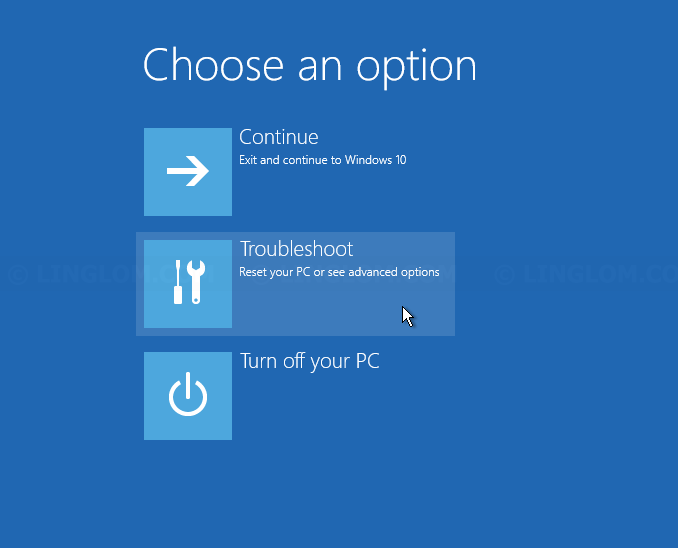
- On Choose an option, select Troubleshoot.
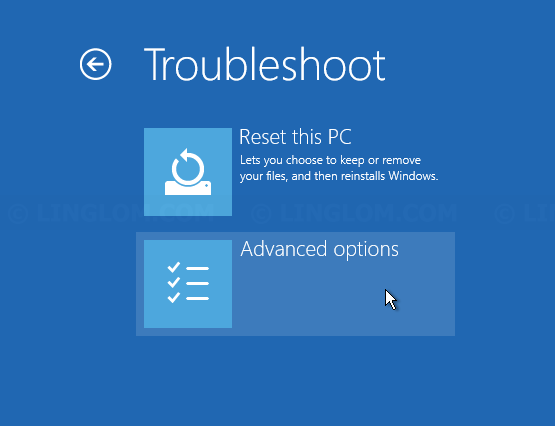
- Select Advanced options.
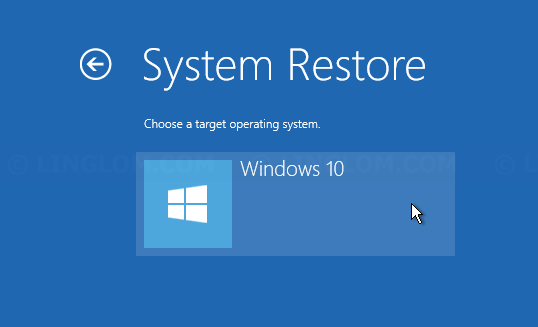
- Select System Restore.

- Select target operating system.
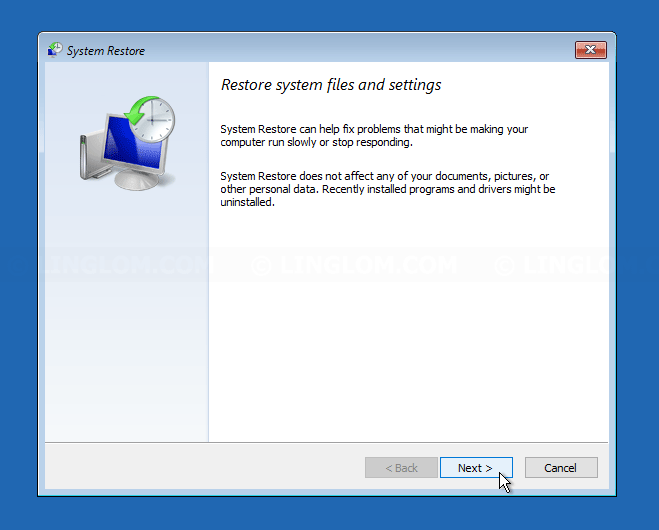
- On System Restore, click Next.
- Here you see restore points which you can choose to restore your system. Select a restore point. If you don’t know which one to choose, I suggest to select the most recent one. Then, click Next.
Note: You can click Show more restore points which will display more earlier points. And you can also click Scan for affected programs to display list of programs that will be deleted or restored if you select this restore point.
- Click Finish.
- Click Yes to confirm.
- In this example, it took about 10 minutes to restore my system.
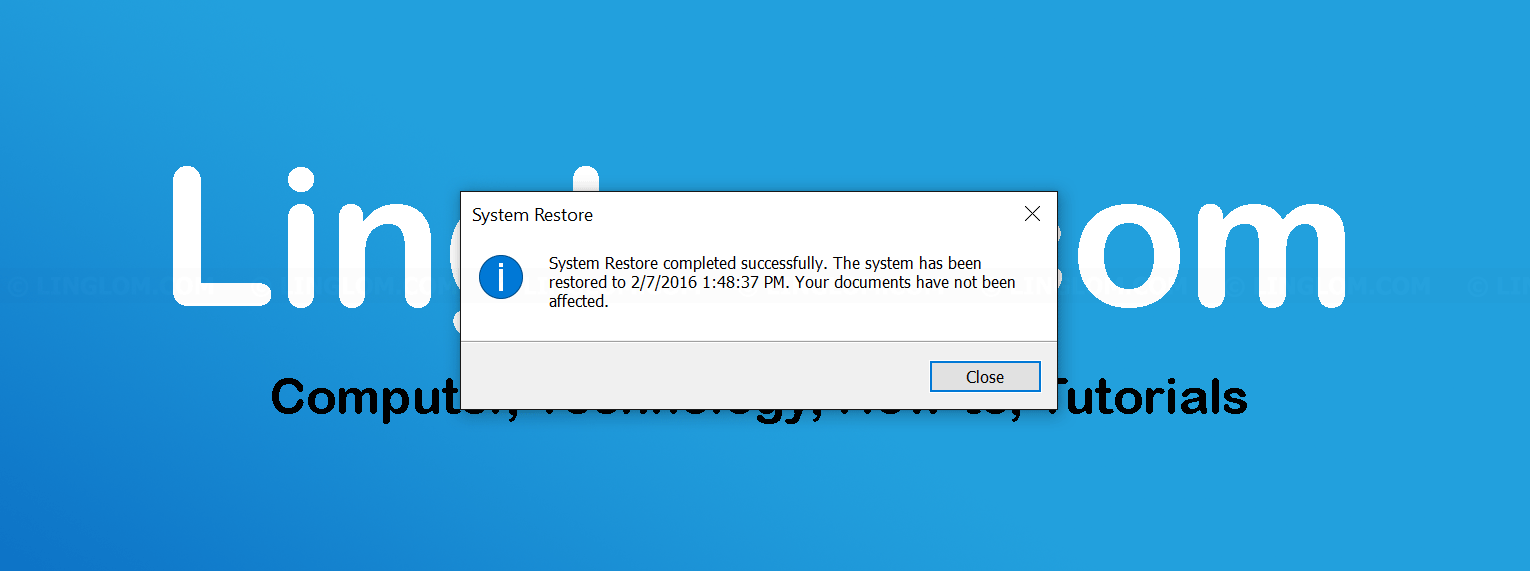
- When it finishes, click Restart.
- After your PC is restarted, you should have your system as it was at the time it was restored to.
Brilliant info, many thanks for the help.
John